WWI Naval Battle – Copenhagen 1914

Copenhagen the verb that is. In May 1914 the British finally accept Admiral Fisher’s suggestions (made in 1904 and 1908) to preemptively attack the German fleet in the naval base at Wilhelmshaven. A routine flight by the German Navy’s only dirigible, the L 3, spots the British in the North Sea in time for the German fleet to sortie.

Visibility was 14,000 yards. Wind was westerly at 8 knots and the seastate was 2.

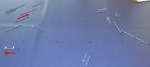
Status at the end of the game: Cope-end-status

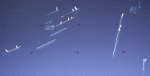
Damage output summary: Cope-damage
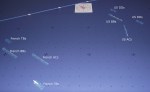
Plot: Cope-plot

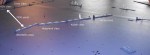
Plot showing flotilla torpedo attacks: Cope-plot-flot

Analysis:

Examining only the battleship action, the British hit rate was 9.3% and the German hit rate was 14.1%. This difference was the result of the westerly wind blowing the gun and funnel smoke in front of the British line, while the German smoke was blown to the disengaged side. The British needed the guidance in the Grand Fleet Battle Orders (~ May 1916):

Weather …The leeward position, with the wind on the engaged bow, is usually the better … the main consideration is that of being in a position where the gun and funnel smoke from our own ships do not interfere with gunlaying… [page 15]

I don’t know if there was any such guidance in May of 1914.

The British suffered gun losses due to 29 turret face penetrations. Four British battleships were lost to explosions as a result of turret fires reaching the magazines. Turret hits represented 14.7% of all hits on British ships and 12.7% of all hits on German ships. These numbers are consistent with the algorithms. The consequences (for the British) of turret hits are so significant that the algorithms for turret face hits and penetrations will be elaborated in future code modifications. For example, the probability of a turret hit for flat trajectory shells will be examined, and the curvature of British turret faces might need to be modeled.

The strategic lesson is that a preemptive attack should have been considered at an earlier date, ideally before the Germans developed effective AP shells.

WWI Naval Battle – Italians vs French

In another non-historical scenario, the Italians decide the Central Powers will be the winning side. The Italian fleet sails out to challenge the French fleet.

Visibility was 24,000 yards. Wind was north-westerly at 16 knots and the seastate was 3.

Status at the end of the game: Italia final status

Damage output summary (part 1): Damage part 1

Damage output summary (part 2): Damage part 2

Plot (part 1): Italia plot 1st part

Plot (part 2): Italia plot 2nd part


The volume of fire of the four Cavour and Duilio class ships was about 50% greater than that of the four Courbet class ships (13 gun vs 10 gun broadsides and a slightly higher rate of fire). The longer range French torpedoes might have evened the odds, but the attacks were stopped or evaded. A decisive victory for Italy and a good test of the code.

WWI Naval Battle – Mediterranean 1917

This fictional scenario was designed to test new destroyer/torpedo boat guide algorithms. For each fleet, two ships can be designated as guides. DD/TB units can then be ordered to take station on those guides instead of being given normal movement orders.

Visibility was 24,000 yards. Wind was north-westerly at 10 knots and the seastate was 2.

Status at the end of the game: Fr-US end status

Damage output summary: Output 19MAR2014

Plot: Fr-US plot

When we quit, damage to the battleships was about even, but the French armored cruisers and torpedo boats had suffered much more damage than those of the US. The small French TBs were sunk primarily by fire from the 5 inch guns of the US BBs. There were no successful torpedo attacks, but the US AC Montana was accidentally torpedoed by US DDs.

WWI Naval Battle – North Sea 1916

This fictional scenario was designed to test revised torpedo algorithms and also to experiment with several tactical concepts mentioned in Friedman, Naval Weapons of World War One, Chapter I:1, Gun Tactics. Fleets of 16 battleships (as envisioned by Plunkett) meet on opposite courses (addressed in Admiral Callaghan’s ‘Instructions for the Conduct of the Fleet in Action’ of October 1913). The order of battle assumes that the British and German battlecruisers and the British 5th Battle Squadron are engaged elsewhere. The 12in gunned British battleships were sent to cover Tershellling in the event the German fleet attempted to return to port by that route. The German pre-dreadnoughts were left in port. HMS Audacious was not lost in 1914.

Visibility was 11,000 to 12,000 yards, with the best visibility looking toward the east. Wind was westerly at 10 knots and the seastate was 3.

Status at the end of the game: IOt8a

Damage output summary: Output 5MAR2014

Plots:

First 20 minutes: 1916 Plot 1-20

20 to 25 minutes: 1916 Plot 20-25

25 to 35 minutes: 1916 Plot 25-35

Complete 35 minute plot: 1916 Plot

Two British armoured cruisers and one light cruiser are sunk, but the German battleships take much more damage than the British. With the battle still in doubt, we had to call it a day.

WWI Naval Battle – Fehmarn Belt, Part II

In this fictional battle using the WWI naval game program, the Russian Baltic fleet sails to attack Kiel in August 1914. The game is continued from the earlier maneuvers posted here. Since the torpedo algorithms were significantly revised, the game was backed up several minutes to restart prior to any significant action.

The plot was complicated, so it was divided into two 20 minute plots:

Fehmarn8 plot first 20

Fehmarn8 plot last 20

Status at the end of the game: Fehmarn8 status

Damage output summary: Output 2-26-2014