Today the local HMGS-South group played a game of Talon. The Terran forces were tasked with defending the planet Eden from a Talon fleet. Six players controlled 13 ships (6 Terran, 7 Talon).
After 3.5 hours of play, the Talons had done more than half of the damage to Eden required for victory. Given the long reload times of the weapons we decided against trying to finish.
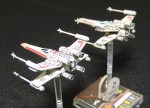
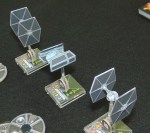
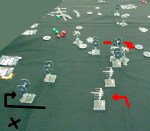
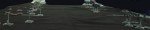
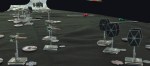
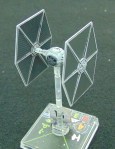
This weekend the local HMGS-South group played a Star Wars: X-Wing Miniatures game. The scenario was a rematch of the previous game, but with equal points instead of a canonical setup.
Six X-wings faced 8 Tie fighters and 1 Tie Advanced starfighter.
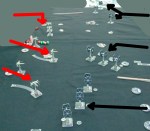
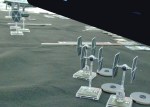
Everyone shifts to the Imperial left except the Tie Advanced and its wingmen.
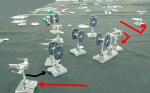
The lines exchange fire and pass through.
A Tie is the first casualty.
The furball favors the Imperials.
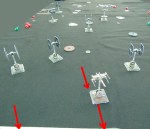
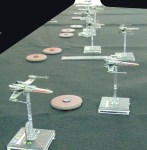
Two remaining X-wings escape off the table.
Four X-wings and two Tie fighters were lost. The last two X-wings escaped.
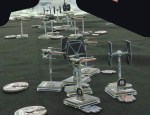
With the Death Star approaching, Y-wings from Gold Squadron and X-wings from Red Squadron and Green Squadronwere dispatched to carry out the attack plan. A total of 30 ships were deployed in the assault on the Death Star: 8 Y-wings making up Gold Squadron and 22 X-wings, some making up Red Squadron and the rest making up Green Squadron.The Starfighters weaved through the turret emplacements destroying many as they passed.
The Death Star’s defenses were designed for a direct, large-scale assault. By using small, one-man fighters, the Rebels would slip through the Death Star’s main defenses, maneuver down a narrow trench leading to the exhaust port, and insert proton torpedoes through the exhaust port.
Some time into the battle, Imperial officer Jude Edivon aboard the Death Star identified the threat of the Rebels’ attack strategy, and attempted to warn her superiors of the danger. However, Grand Moff Tarkin ignored the warning and refused to evacuate the station or launch any of the stations hundreds of fighters. Meanwhile, Darth Vader himself decided to lead his personal squadron of TIE Fighters to destroy the remaining Rebel fighters.
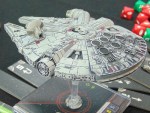
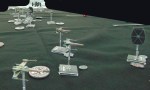
The game consisted of the main dogfight between elements of Red Squadron (7 X-wings), Gold Squadron (3 Y-wings) against Black Squadron’s 9 Tie Fighters. Meanwhile Han Solo was fighting with his conscience whether to intervene with the Millennium Falcon or continue on his way to payoff Jabba the Hut.
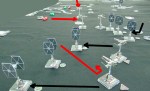
X-wings advance and Y-wings edge right toward the center.
Tie Fighters move to both flamks while Vader and his two wingmen advance in the center.
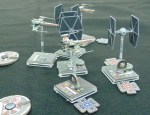
Vader has lost a wingman to concentrated X-wing fire.
A furball in the foreground. Vader has lost his other wingman.
Another Tie Fighter is destroyed on the Imperial left wing.
In the distance, the Imperial right wing swings inward to attack the Y-wings.
In the end, seven Tie Fighters and one X-wing were lost. The Rebel ships continued on toward their mission to bomb the Death Star. Darth Vader survived to return in Episodes V and VI.
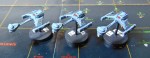
These are Amarillo Design Bureau Starline 2500 series ‘Klingon E4 Light Frigates‘ cast in metal several years ago. At 36 mm in length, they are much larger than my old escorts. They will be used for a class intermediate in size between my F5s and D7s. The E4s and F5s will thus be reversed by size, but that avoids re-labeling all the old models.
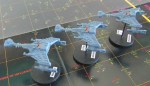
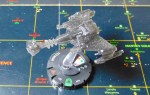
These are Star Trek HeroClix I.K.S. Amar models (from the Tactics IV set), after painting and rebasing. Compared to the normal HeroClix Klingon battlecruisers, they have extra bits sticking out from the front of the wings and from the neck, as well as other differences in detail. In most Star Trek lore the Amar is the quintessential K’t’inga class. The card that came with these models mentions the Kelvin Timeline, so that may explain the differences.
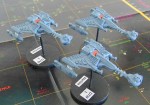
The third photo shows the unpainted Amar on the original HeroClix base.


You must be logged in to post a comment.