This fleet action is based on the low point of Grand Fleet numerical superiority over the High Seas Fleet, as described in Massie, Robert K., “Castles of Steel,” Chapter 20, page 372. Based on the results of the Dogger Bank scenario played earlier, the opposing battle cruisers are still under repair.
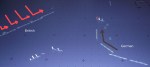
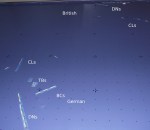
The German battle cruisers form quarter line so that the rear ships can avoid the smoke of the lead ships.
The British sail east and then south to get between the Germans and the Jade.
The Lion, leading the British line, sinks from accumulated hits.
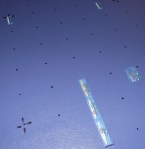
Rather than trying to escape to the southeast, the Germans decide to fight it out. [It would not be much of a game otherwise.] They maneuver to close the range while keeping their guns bearing and avoiding smoke obstruction. Although the gunnery duel is about even, the larger force of British cruisers and destroyers would probably prevent the heavily damaged German battle cruisers from reaching port.
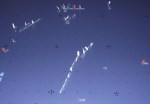
The portions of the Grand and High Seas fleets that were not involved in the Kattegat battle had their own action at the same time. The British 1st and 4th Battle Squadrons, providing distant cover for the Kattegat force, are engaged by the newer German dreadnoughts steaming north from the Jade (Battle Squadron III and Scouting Group I).
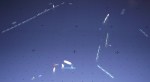
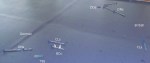
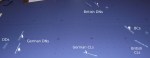
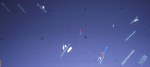
Both fleets begin to form battle lines headed east. The top of the photo is north.
A signal sent to the wrong division delays the British deployment. The German dreadnoughts are out of range, so the German battle cruisers take most of the British fire in the early turns.
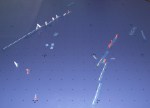
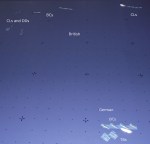
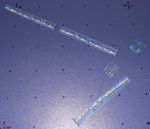
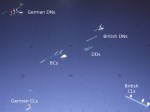
The rear British division about to turn into line. DDs race to their new stations.
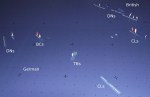
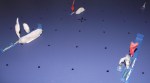
Both fleets have reversed course to the west. St. Vincent and a British CL have blown up. Seydlitz has sunk.
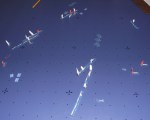
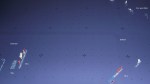
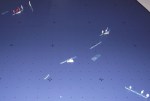
Two British dreadnoughts have veered out of line with steering hits. The westerly wind has favored British shooting.
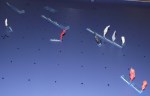
Close-up of the British fleet passing the wreck of the St. Vincent.
This is the second in a series of hypothetical battles based on the implementation of the strategy suggested by Wolfgang Wegener (“The Naval Strategy of the World War“). For a brief description of the Wegener Thesis, see this article.
After taking the Jutland peninsula, the Germans establish a naval base at Frederikshavn. The British send the battle cruisers remaining operational from the previous battle and a supporting battle squadron into the Kattegat to disrupt German mining efforts.
This is the first of a series of hypothetical battles based on the implementation of the strategy suggested by Wolfgang Wegener (“The Naval Strategy of the World War“).
Having failed to defeat France in the campaign of 1914, the Germans invade Denmark as the first step to achieving a geographical position from which a naval war against Britain can be waged. To support the advance of the army north through the Jutland peninsula, the pre-dreadnought squadrons sortie from Kiel to bombard the southern defenses of Aarhus. British intelligence intercepts allow them to send the battle cruiser squadrons into the Kattegat in response.
After 50 minutes of maneuvering, the British established a favorable position to leeward blocking the German retreat. We called the game at that point since it was getting late. We expected many German ships to be destroyed, unless the British lost battlecruisers to magazine explosions. In any case, the German army would get no naval support at Aarhus.


You must be logged in to post a comment.