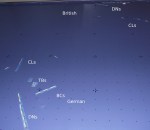
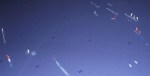
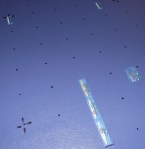
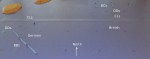
The portions of the Grand and High Seas fleets that were not involved in the Kattegat battle had their own action at the same time. The British 1st and 4th Battle Squadrons, providing distant cover for the Kattegat force, are engaged by the newer German dreadnoughts steaming north from the Jade (Battle Squadron III and Scouting Group I).
Both fleets begin to form battle lines headed east. The top of the photo is north.
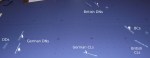
A signal sent to the wrong division delays the British deployment. The German dreadnoughts are out of range, so the German battle cruisers take most of the British fire in the early turns.
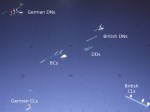
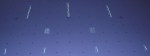
The rear British division about to turn into line. DDs race to their new stations.
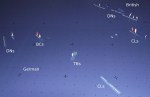
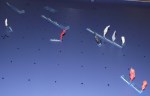
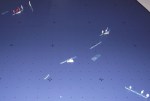
Both fleets have reversed course to the west. St. Vincent and a British CL have blown up. Seydlitz has sunk.
Two British dreadnoughts have veered out of line with steering hits. The westerly wind has favored British shooting.
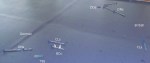
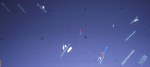
Close-up of the British fleet passing the wreck of the St. Vincent.
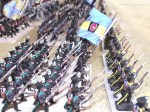
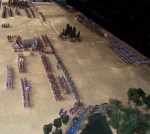
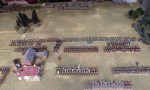
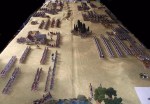
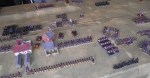
This weekend the local HMGS-South group played a Napoleonic game using Column, Line and Square, Version 2. The scenario was an Allied attack on the French near Probstheyda, south of Leipzig, on 18 October 1813.
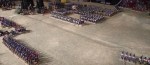
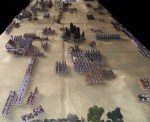
The French are on the left (north). On the right, from top to bottom, are the Prussians, Russians and Austrians.
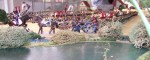
The French right (western) flank with the Austrians in the distance.
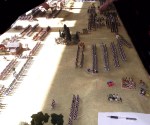
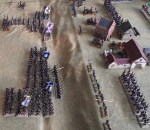
The French left deployed on rising ground.
The Allies advance.
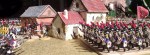
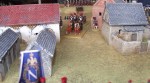
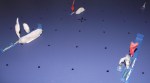
The Emperor and his band.
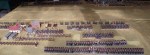
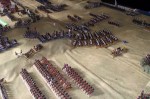
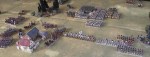
Additional troops arrive on both sides.
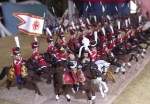
The cavalry clash in the center.
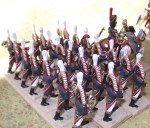
Austrian infantry formations advance.
Austrian lights wipe out the crew of a French battery.
More cavalry clash in the center.
The assault on the French left.
After 4 turns, and the end of the game.
The Allied objective was to take both villages. The French objective was to drive the Allies from the field. When the game was ended due to time, neither side had achieved their objectives.
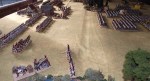
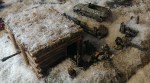
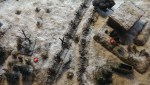
This weekend the local HMGS-South group played a Bolt Action game. German infantry defend a bridge against Soviet tanks, infantry and mortars. The terrain table was by Real Terrain.
Russians on the left must cross the frozen river to take buildings on the right guarding the bridge.
German bunker with AT gun.
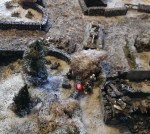
A close range firefight near the bunker results in heavy casualties to both sides.
Russian infantry and a tank cross the bridge, but fail to take the objective buildings.
In spite of their AT gun being blocked by smoke for the entire game, the Germans hold the objectives.
This is the second in a series of hypothetical battles based on the implementation of the strategy suggested by Wolfgang Wegener (“The Naval Strategy of the World War“). For a brief description of the Wegener Thesis, see this article.
After taking the Jutland peninsula, the Germans establish a naval base at Frederikshavn. The British send the battle cruisers remaining operational from the previous battle and a supporting battle squadron into the Kattegat to disrupt German mining efforts.
This is the first of a series of hypothetical battles based on the implementation of the strategy suggested by Wolfgang Wegener (“The Naval Strategy of the World War“).
Having failed to defeat France in the campaign of 1914, the Germans invade Denmark as the first step to achieving a geographical position from which a naval war against Britain can be waged. To support the advance of the army north through the Jutland peninsula, the pre-dreadnought squadrons sortie from Kiel to bombard the southern defenses of Aarhus. British intelligence intercepts allow them to send the battle cruiser squadrons into the Kattegat in response.
After 50 minutes of maneuvering, the British established a favorable position to leeward blocking the German retreat. We called the game at that point since it was getting late. We expected many German ships to be destroyed, unless the British lost battlecruisers to magazine explosions. In any case, the German army would get no naval support at Aarhus.


You must be logged in to post a comment.