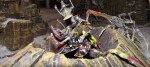
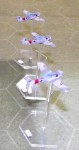
Three scientists required evacuation by Mobile Infantry when their lab was attacked by the Arachnids. The initial defense consisted of robots and mercenaries which were nearly wiped out by the time the infantry arrived in two dropships.
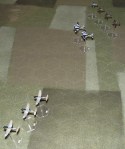
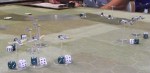
Robots and mercs prepare to defend the base.
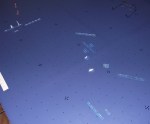
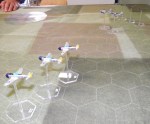
The first bugs appear.
Four bug tunnel entrances surround the base.
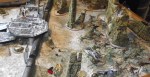
Robots on the landing pad are wiped out by Warrior bugs and a Tanker bug.
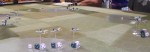
Another horde of bugs swarms forward.
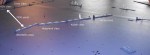
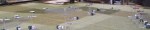
Chickenhawks and elite troopers arrive to evacuate the scientists. One of the dropships has crashed in the background, brought down by long range Plasma bug fire.
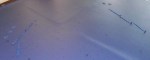
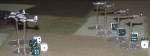
Nucs have been used to clear an area of bugs. The remaining dropship lands and picks up the scientists.
The scientists were rescued, at the cost of one dropship and most of the troopers, mercs and robots.
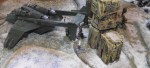
This fictional scenario was designed to test new destroyer/torpedo boat guide algorithms. For each fleet, two ships can be designated as guides. DD/TB units can then be ordered to take station on those guides instead of being given normal movement orders.
Visibility was 24,000 yards. Wind was north-westerly at 10 knots and the seastate was 2.
The fleets have maneuvered to nearly parallel courses at about 15,000 yards.
The wreck of the French AC Waldeck Rousseau can be seen in the left rear. The remaining ACs and two of the French battleships have taken medium damage. The few remaining French TBs are in the foreground.
Within minutes of each other, battleships from each side suffer steering hits and turn out of line. The Utah was designated as a guide for US DDs, so they followed her. Preventing this will require a code change.
When we quit, damage to the battleships was about even, but the French armored cruisers and torpedo boats had suffered much more damage than those of the US. The small French TBs were sunk primarily by fire from the 5 inch guns of the US BBs. There were no successful torpedo attacks, but the US AC Montana was accidentally torpedoed by US DDs.
This fictional scenario was designed to test revised torpedo algorithms and also to experiment with several tactical concepts mentioned in Friedman, Naval Weapons of World War One, Chapter I:1, Gun Tactics. Fleets of 16 battleships (as envisioned by Plunkett) meet on opposite courses (addressed in Admiral Callaghan’s ‘Instructions for the Conduct of the Fleet in Action’ of October 1913). The order of battle assumes that the British and German battlecruisers and the British 5th Battle Squadron are engaged elsewhere. The 12in gunned British battleships were sent to cover Tershellling in the event the German fleet attempted to return to port by that route. The German pre-dreadnoughts were left in port. HMS Audacious was not lost in 1914.
Visibility was 11,000 to 12,000 yards, with the best visibility looking toward the east. Wind was westerly at 10 knots and the seastate was 3.
British destroyers launch torpedo attacks toward the German line and retire.
The German battleships have taken some torpedo hits, but continue without loss of speed. British armoured cruisers have taken damage from the leading German battleships.
The older ships at the rear rear of the German line suffer under the guns of the leading British battleships. British armoured cruisers are shattered and British light cruisers pass down the German battleline.
Two British armoured cruisers and one light cruiser are sunk, but the German battleships take much more damage than the British. With the battle still in doubt, we had to call it a day.
In this fictional battle using the WWI naval game program, the Russian Baltic fleet sails to attack Kiel in August 1914. The game is continued from the earlier maneuvers posted here. Since the torpedo algorithms were significantly revised, the game was backed up several minutes to restart prior to any significant action.
The plot was complicated, so it was divided into two 20 minute plots:
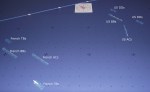
Looking southwest, with the Germans to the west (right) and the Russians to the east (left).
Russian battleships and armored cruisers in the foreground have turned away from a torpedo attack, but are nearing the southern shore of the Fehmarn Belt. The torpedoes miss as a result of the maneuver.
The Russians have reformed into column and head back to the north. In the distance, the Germans have taken torpedo hits on two battleships, seriously damaging them.
Crippled German battleships (red markers) are sent west out of the battle.
A melee of cruisers, destroyers and torpedo boats between the fleets.


You must be logged in to post a comment.