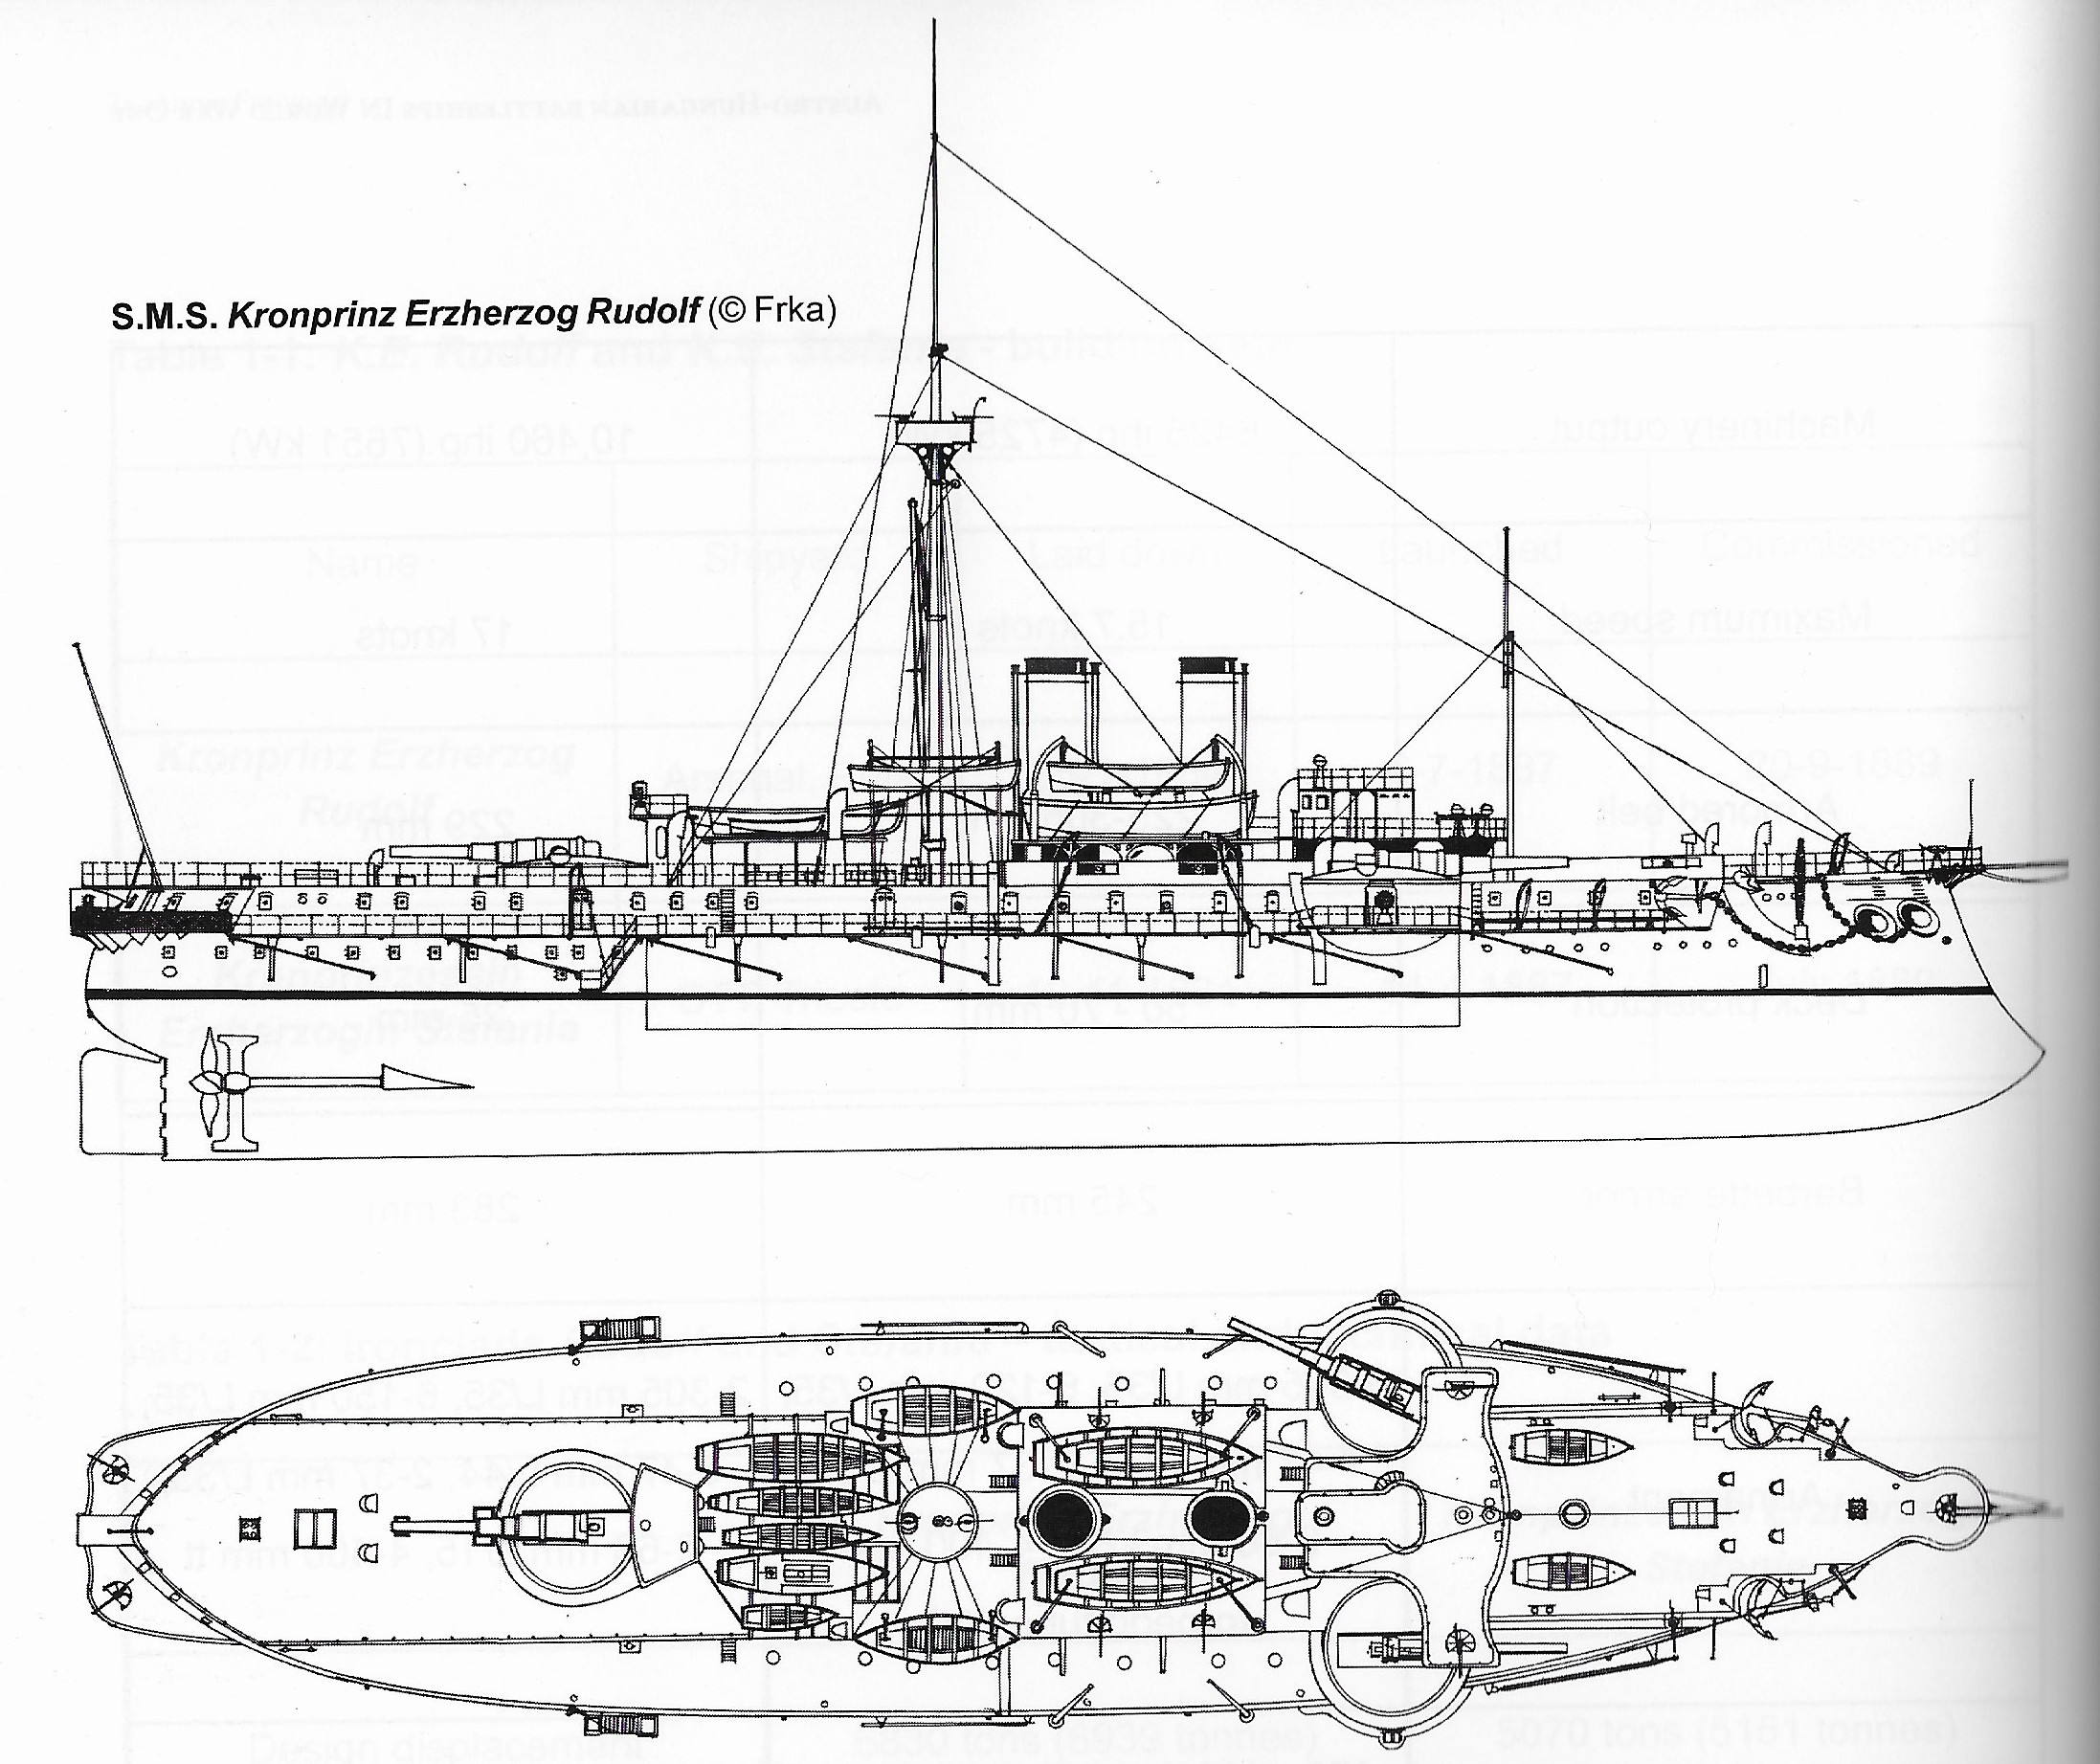
S.M.S. Kronprinz Erzherzog Rudolf was a ‘turreted ironclad’ (Turmschiffe) commissioned in 1889, and in Austro-Hungarian service on and off until around February 1918. The main armament was three 305 mm guns mounted individually in barbettes.
A group in British Columbia recently ran an interesting naval game using the Steel Fleets rules (facebook link). Although it was a few years beyond what my code is designed for, most of the ships involved were from WW1. I have attempted to recreate the game’s initial conditions and early movements. Since the French had some ex-German ships and the Italians had some ex-Austro-Hungarian ships, the nationalities for those ships were overridden so that French or Italian shells and propellants were used.
Winds East at 10 knots. Sea state 2. Visibility increasing from 16,400 to 20,800 yards over the first 10 minutes.
Admiralty Floating Docks AFD4 and AFD5 were completed in 1912 to handle ships of up to 32,000 tons. AFD4 was at Sheerness in 1912 and Jarrow in 1915. AFD5 was at Invergordon from 1914 through 1919.
Having recently made significant modifications to the game code, I used the ‘Run to the South’ phase of Jutland as a test case. Course changes, speeds and formations were followed as closely as practical, given that inputs are only changed every five minutes. The primary source was the signals information in Brooks, although plots from Marder, Campbell, Tarrant and the Naval Staff Appreciation were also used. See the list of references below.
In some cases the game code was unable to reproduce formation changes as they seem to have occurred historically. Two examples follow.
Example 1:
When the IAG (First Scouting Group) turned from their initial northwesterly course at 2:27pm GMT, Brooks Table 5.4 gives these signals: 2.27 Turn together to port to WSW 2.30 Follow in wake of SO’s ship 2.43 Turn together to starboard to WSW and states in the text that after 2.27 Hipper “seems to have headed SW for a time in line ahead.” This is consistent with Map 2 of the Harper Report and with Figure 11 in Tarrant.
It is not clear to me how the steaming order of the unit was maintained through the approximately 200 degree turn. Perhaps the trailing ships slowed, with the last ship slowing the most. The game code made a complete hash of the maneuver, but since the IAG was not in combat the disorder did not matter.
I find it interesting that Marder (map 4) and Campbell (Chart 1) have a different plot for the IAG in this period, with no movement in the southwesterly direction at all.
When the 1BCS and 2BCS (battle cruiser squadrons) turn east in response to the sighting of the IAG, the 2BCS is stationed 3 miles ENE of the 1BCS. Brooks Table 5.9 gives these signals: 3.30 Alter course leading ships together the rest in succession to E, 25 knots 3.34 (to 2BCS) Prolong the line by taking station astern Brooks criticizes Beattly since “… the two weakly armoured battlecruisers were thrust forward three miles closer to the enemy and with no prospect of getting into line with Lion and the 1BCS without some violent maneuvering.” The game code had no serious problem putting the 2BCS in line behind the 1BCS, although with the increase in ordered speed to 25 knots, the 26 knot Indefatigable class ships lagged a few hundred yards behind after their speed loss in the turns. The game code reduces acceleration significantly as a ship nears its maximum speed.
The rest of the exercise played out as expected, up to the point where the High Seas Fleet would have been sighted. The Lion lost a gun, the Derfflinger lost a turret, the Tiger blew up, the 5BS started engaging the IAG and the IAG avoided a torpedo attack.
References: Brooks, John, “The Battle of Jutland,” 2016. Campbell, John, “Jutland An Analysis of the Fighting,” 1986. Marder, Arthur J., “From the Dreadnought to Scapa Flow,” 1978. Schleihauf, William, “Jutland The Naval Staff Appreciation,” 2016. Tarrant, V. E., “Jutland The German Perspective,” 1995.
Winds WSW at 12 knots. Sea state 3. Visibility 23,000 yards.
The Foudre was a French seaplane carrier, converted from an 1896 torpedo boat tender in 1911. This 1/6000 scale model is an approximation based on photos. Also shown is a German Navy dirigible and a generic game marker for a deployed seaplane (or other scouting aircraft). The seaplane is oversize for 1/6000, but is as small as I was able to carve.


You must be logged in to post a comment.