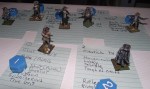
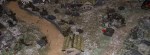
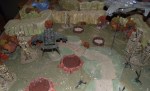
Saturday the local HMGS-South group played a game of Gutshot, in which seven tough gunslingers defended a western town from bandits. We played through the game twice. Each time the town was saved, but not without some highly cinematic deaths among the gunslingers. One player learned that playing with dynamite is dangerous.
The ‘seven’. No, not those seven….
Bandits at the bottom of the photo.
The town-folk are hiding inside. A few will help out in the second game.
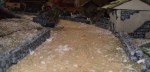
In the second game the bandits use more cover in their approach.
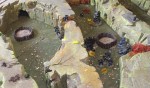
Bandits rush into a building. Four have a point blank fight with a gunslinger armed with two sawed-off shotguns. Nobody survives on either side.
One gunslinger is trapped under a fallen horse for a time.
The bandit leader, having sacrificed most of his men, leaves in a rush.
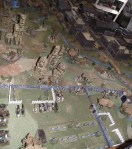
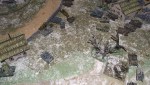
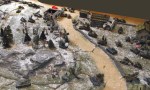
This weekend the local HMGS-South group played a Rapid Fire game. German and Soviet forces, mostly armor, race to take a crossroads and set up AT guns.
The start and the plans.
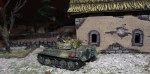
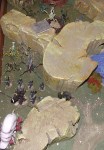
German tanks take up positions using the stone walls for cover.
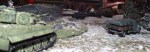
Tigers lurk, looking for targets.
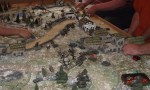
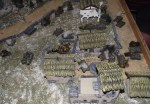
Soviets reach the road across from the German positions and a bloody exchange of fire begins.
Casualties and failed morale checks cause the advantage to shift back and forth.
The Soviets have the crossroads, but have few tanks left. Gunning down the last of the German AT crews wins them the game by a hair.
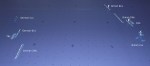
After the battle in the Fehmarn Belt, the surviving British ships passed through the Kattegat to the Skagerrak. There they were met by the other division of the 2nd Battle Squadron (four Orion class dreadnoughts) and the battlecruiser New Zealand (assigned to the 1st BCS at this time). This force was then intercepted by German ships from Wilhelmshaven.
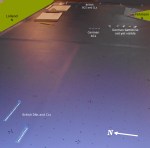
View looking North. The fleets meet just north of Danish coastal waters. Several British ships have damage from the previous battle.
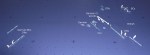
German CLs screen a TB attack and are destroyed. British maneuvers avoid torpedo hits.
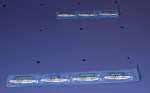
The fleets race NW towards the Lion, heavily damaged in the previous battle.
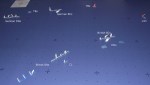
As the range closes, both side accumulate damage. The wind favors the British.
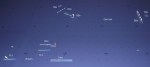
The Lion is protected and the German fleet turns toward home. A course error sends the British DNs straight toward the German guns. The Orion blows up and the Monarch drops out of line.
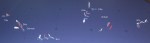
The German intention to break off is thwarted since several DNs are slowed by flooding.
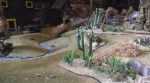
This Saturday the local HMGS-South group played a Starship Troopers game. Special Forces troops, Mobile Infantry and Chicken-hawks escort a scientist and a psyker into underground tunnels to capture a Brain Bug. Opposition was initially light but the psyker warned of a trap. Undeterred, the force pressed on. Sudden mass attacks of bugs forced the dropships to leave the atmosphere. The infantry fought their way to the Brain Bug, but were surrounded by bugs. Part II will be played out as a future game.
The landing zone. The wall at the top represents the underground area.
The flat tops of the walls are the tunnel ceilings. The Chicken-hawk is actually in the low passageway blocking the troops behind.
Explosive weaponry can bring down portions of the tunnel overhead.
Troops proceeding cautiously.
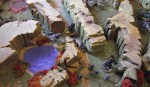
The bugs emerge from a lower level via several holes at once.
The Brain Bug is threatened and the warrior bugs back off.
In June 1914, units of the British fleet were in the Baltic Sea. A division of the 2nd Battle Squadron (four King George V class dreadnoughts) commanded by Vice Admiral Sir George Warrender and three light cruisers were in Kiel, Germany between June 23rd and June 30th. The 1st Battlecruiser Squadron commanded by Rear Admiral Sir David Beatty visited Riga, Revel and Kronstadt, and was in Kronstadt on the 28th when the assassination of Austrian Archduke Ferdinand occurred.
This hypothetical engagement assumes (1) that the Austrian government promptly responded to the assassination with a declaration of war on Serbia, (2) that a state of war existed between Britain and Germany on July 1st, and (3) that the Germans sortied their available ships to intercept the British squadrons before they could exit the Baltic.
The composition of the German force is extrapolated from the ships mentioned in von Hase’s description of the Kiel visit. British light cruisers are assumed to have also accompanied the 1st BCS.
After leaving Kiel, Warrender cruises in the Fehmarn Belt waiting for Beatty to arrive from the east. The 1st BCS leaves Kronstadt on the 29th in order to reach the Fehmarn Belt on July 1st. Beatty is still a Rear Admiral at this point and Warrender will be in overall command when the two forces join.
References:
George M. Nekrasov, “Expendable Glory: Russian Battleship in the Baltic, 1915-1917” [for the presence of the 1st BCS at Kronstadt on July 28th]
Commander Georg von Hase, “Kiel & Jutland” [for details of the Kiel visit and the ships present]
The two British forces have not yet joined when the first German ships are spotted.
The German fleet revealed. Only one dreadnought.
Vice Admiral Warrender reverses course to the east to aid the battlecruisers.
Lion and several German pre-dreadnoughts take damage.
Two British light cruisers are lost and the Lion limps away covered by the British dreadnoughts.
Just as it seems British will get away without major loss, the Audacious is blown up. A German pre-dreadnought sinks, having survived more than her ‘fünf minuten’. A German torpedo boat half-flotilla is destroyed before it can launch torpedoes.
The British head for the Langeland Belt.
The Germans are damaged enough that they are glad to see the British go.


You must be logged in to post a comment.