This weekend the local HMGS-South group played a game of Pig Wars.
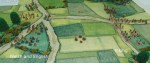
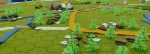
A Viking raiding party led by Eric the Black has been looting the Welsh countryside. Now Eric, his men, and their loot are headed back to ships hidden in large cove to the West of Din Ganwy on the northern coast of Wales. Unbeknownst to Eric, a force of English and Welsh led by Ian Gwynedd stands between the Vikings and their ships.
Vikings
Eric the Black
4 hearthguard with 2-handed axes (Norse Gaels Bodyguard)
Warlord
4 hearthguard with axes
4 hearthguard with hand weapons
8 warriors with spears
4 warriors with Jane weapons
Warlord
4 hearthguard with axes
4 berserkers
8 warriors with spears
4 warriors with Jane weapons
Norse Gaels
Warlord
4 hearthguard with spears
8 warriors with 2-handed axes
8 warriors with spears and hand weapons
Welsh & English
Ian Gwynedd – Gwynedd Clan
4 Fully Armored Warriors (Teulu – Bodyguard)
Warlord
20 Militia Spearmen (Unarmored)
Warlord
15 Militia Archers (Unarmored)
Warlord
15 Warriors
English
Warlord
10 Warriors
5 Crossbow
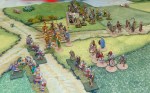
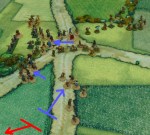
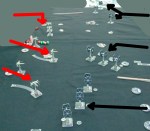
Viking returning to their ships with loads of loot.
Vikings
English and Welsh
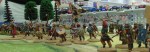
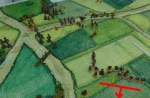
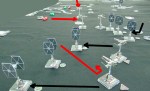
Both sides advance to engage….
Unarmored Welsh bowmen are cut to pieces by Viking warriors.
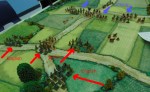
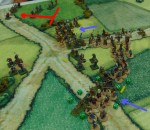
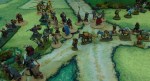
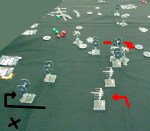
At the top of the photo a messy melee ensues. At the bottom the Welsh bowmen have routed.
An English unit at the top of the photo has fallen back after a melee.
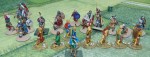
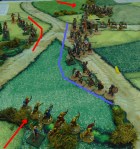
Both sides organize the lines for the final showdown. The remains of the Welsh bowmen return briefly, only to be slaughtered again.
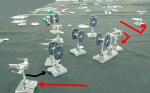
The Vikings concentrate in the center against the few remaining defenders.
Since the Vikings clearly can not be stopped, the English and Welsh retire from the field.
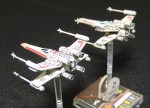
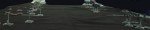
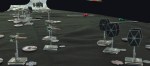
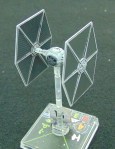
This weekend the local HMGS-South group played a Star Wars: X-Wing Miniatures game. The scenario was a rematch of the previous game, but with equal points instead of a canonical setup.
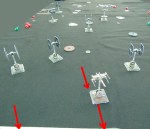
Six X-wings faced 8 Tie fighters and 1 Tie Advanced starfighter.
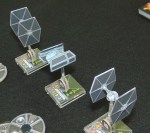
Everyone shifts to the Imperial left except the Tie Advanced and its wingmen.
The lines exchange fire and pass through.
A Tie is the first casualty.
The furball favors the Imperials.
Two remaining X-wings escape off the table.
Four X-wings and two Tie fighters were lost. The last two X-wings escaped.
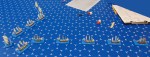
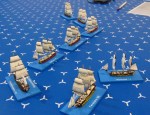
Today we did a quick test of the Ship ‘o the Line naval rules by Battleline, after converting them from the original square grid to a hex grid. This is similar to what was done to create the Wooden Ships and Iron Men game, but retaining the slightly higher complexity of Ship ‘o the Line.
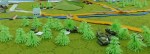
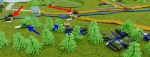
This weekend the local HMGS-South group played a 1980s Europe game using GMT’s MBT rules, with miniatures substituted for the counters. The miniatures used were GHQ 1/285 Micro Armor.
The Soviet 210th Motor Rifle Division leads the Soviet Center Front’s surge across border against the US VII Corps in the Hof Gap region of Germany. The US 1st I.D. (Mech) is moving to block the Soviet advance.
In the initial moves the US loses a lot more tanks than the Soviets do.
View from the US left wing.
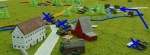
US troops take the main town.
View from the Soviet left wing.
The US left wing is mostly burning tanks.
The objective bridge is held by the US, but only by a knocked out tank.
Objective bridges held at the end of the game.
At the end of the game the US had slightly more points from objectives, but the Soviets more than made up for that in forces destroyed. A solid Soviet win.
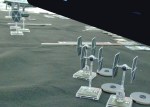
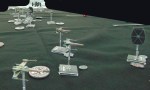
With the Death Star approaching, Y-wings from Gold Squadron and X-wings from Red Squadron and Green Squadronwere dispatched to carry out the attack plan. A total of 30 ships were deployed in the assault on the Death Star: 8 Y-wings making up Gold Squadron and 22 X-wings, some making up Red Squadron and the rest making up Green Squadron.The Starfighters weaved through the turret emplacements destroying many as they passed.
The Death Star’s defenses were designed for a direct, large-scale assault. By using small, one-man fighters, the Rebels would slip through the Death Star’s main defenses, maneuver down a narrow trench leading to the exhaust port, and insert proton torpedoes through the exhaust port.
Some time into the battle, Imperial officer Jude Edivon aboard the Death Star identified the threat of the Rebels’ attack strategy, and attempted to warn her superiors of the danger. However, Grand Moff Tarkin ignored the warning and refused to evacuate the station or launch any of the stations hundreds of fighters. Meanwhile, Darth Vader himself decided to lead his personal squadron of TIE Fighters to destroy the remaining Rebel fighters.
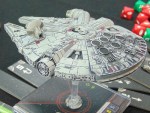
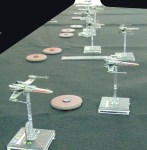
The game consisted of the main dogfight between elements of Red Squadron (7 X-wings), Gold Squadron (3 Y-wings) against Black Squadron’s 9 Tie Fighters. Meanwhile Han Solo was fighting with his conscience whether to intervene with the Millennium Falcon or continue on his way to payoff Jabba the Hut.
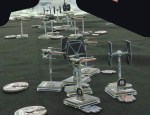
X-wings advance and Y-wings edge right toward the center.
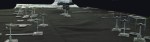
Tie Fighters move to both flamks while Vader and his two wingmen advance in the center.
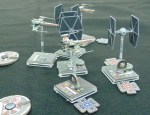
Vader has lost a wingman to concentrated X-wing fire.
A furball in the foreground. Vader has lost his other wingman.
Another Tie Fighter is destroyed on the Imperial left wing.
In the distance, the Imperial right wing swings inward to attack the Y-wings.
In the end, seven Tie Fighters and one X-wing were lost. The Rebel ships continued on toward their mission to bomb the Death Star. Darth Vader survived to return in Episodes V and VI.


You must be logged in to post a comment.