This scenario was inspired by an Admiral of the Fleet game run by the Seekrieg Admiralty at the HURRICON 2025 game convention. Photos of that convention game are in this Google photo album (about halfway down the page).
The description of the scenario is from the HURRICON events guide:
“After the French acquisition of Tunis in 1881, Italian aspirations regarding Tripoli were generally recognized by the Great Powers but tensions between the two countries eventually led to armed conflict in North Africa when Italy began a naval blockade of Tunis. In May of 1901, Italian battleships and cruisers meet their French counterparts in the Gulf of Tunis …”
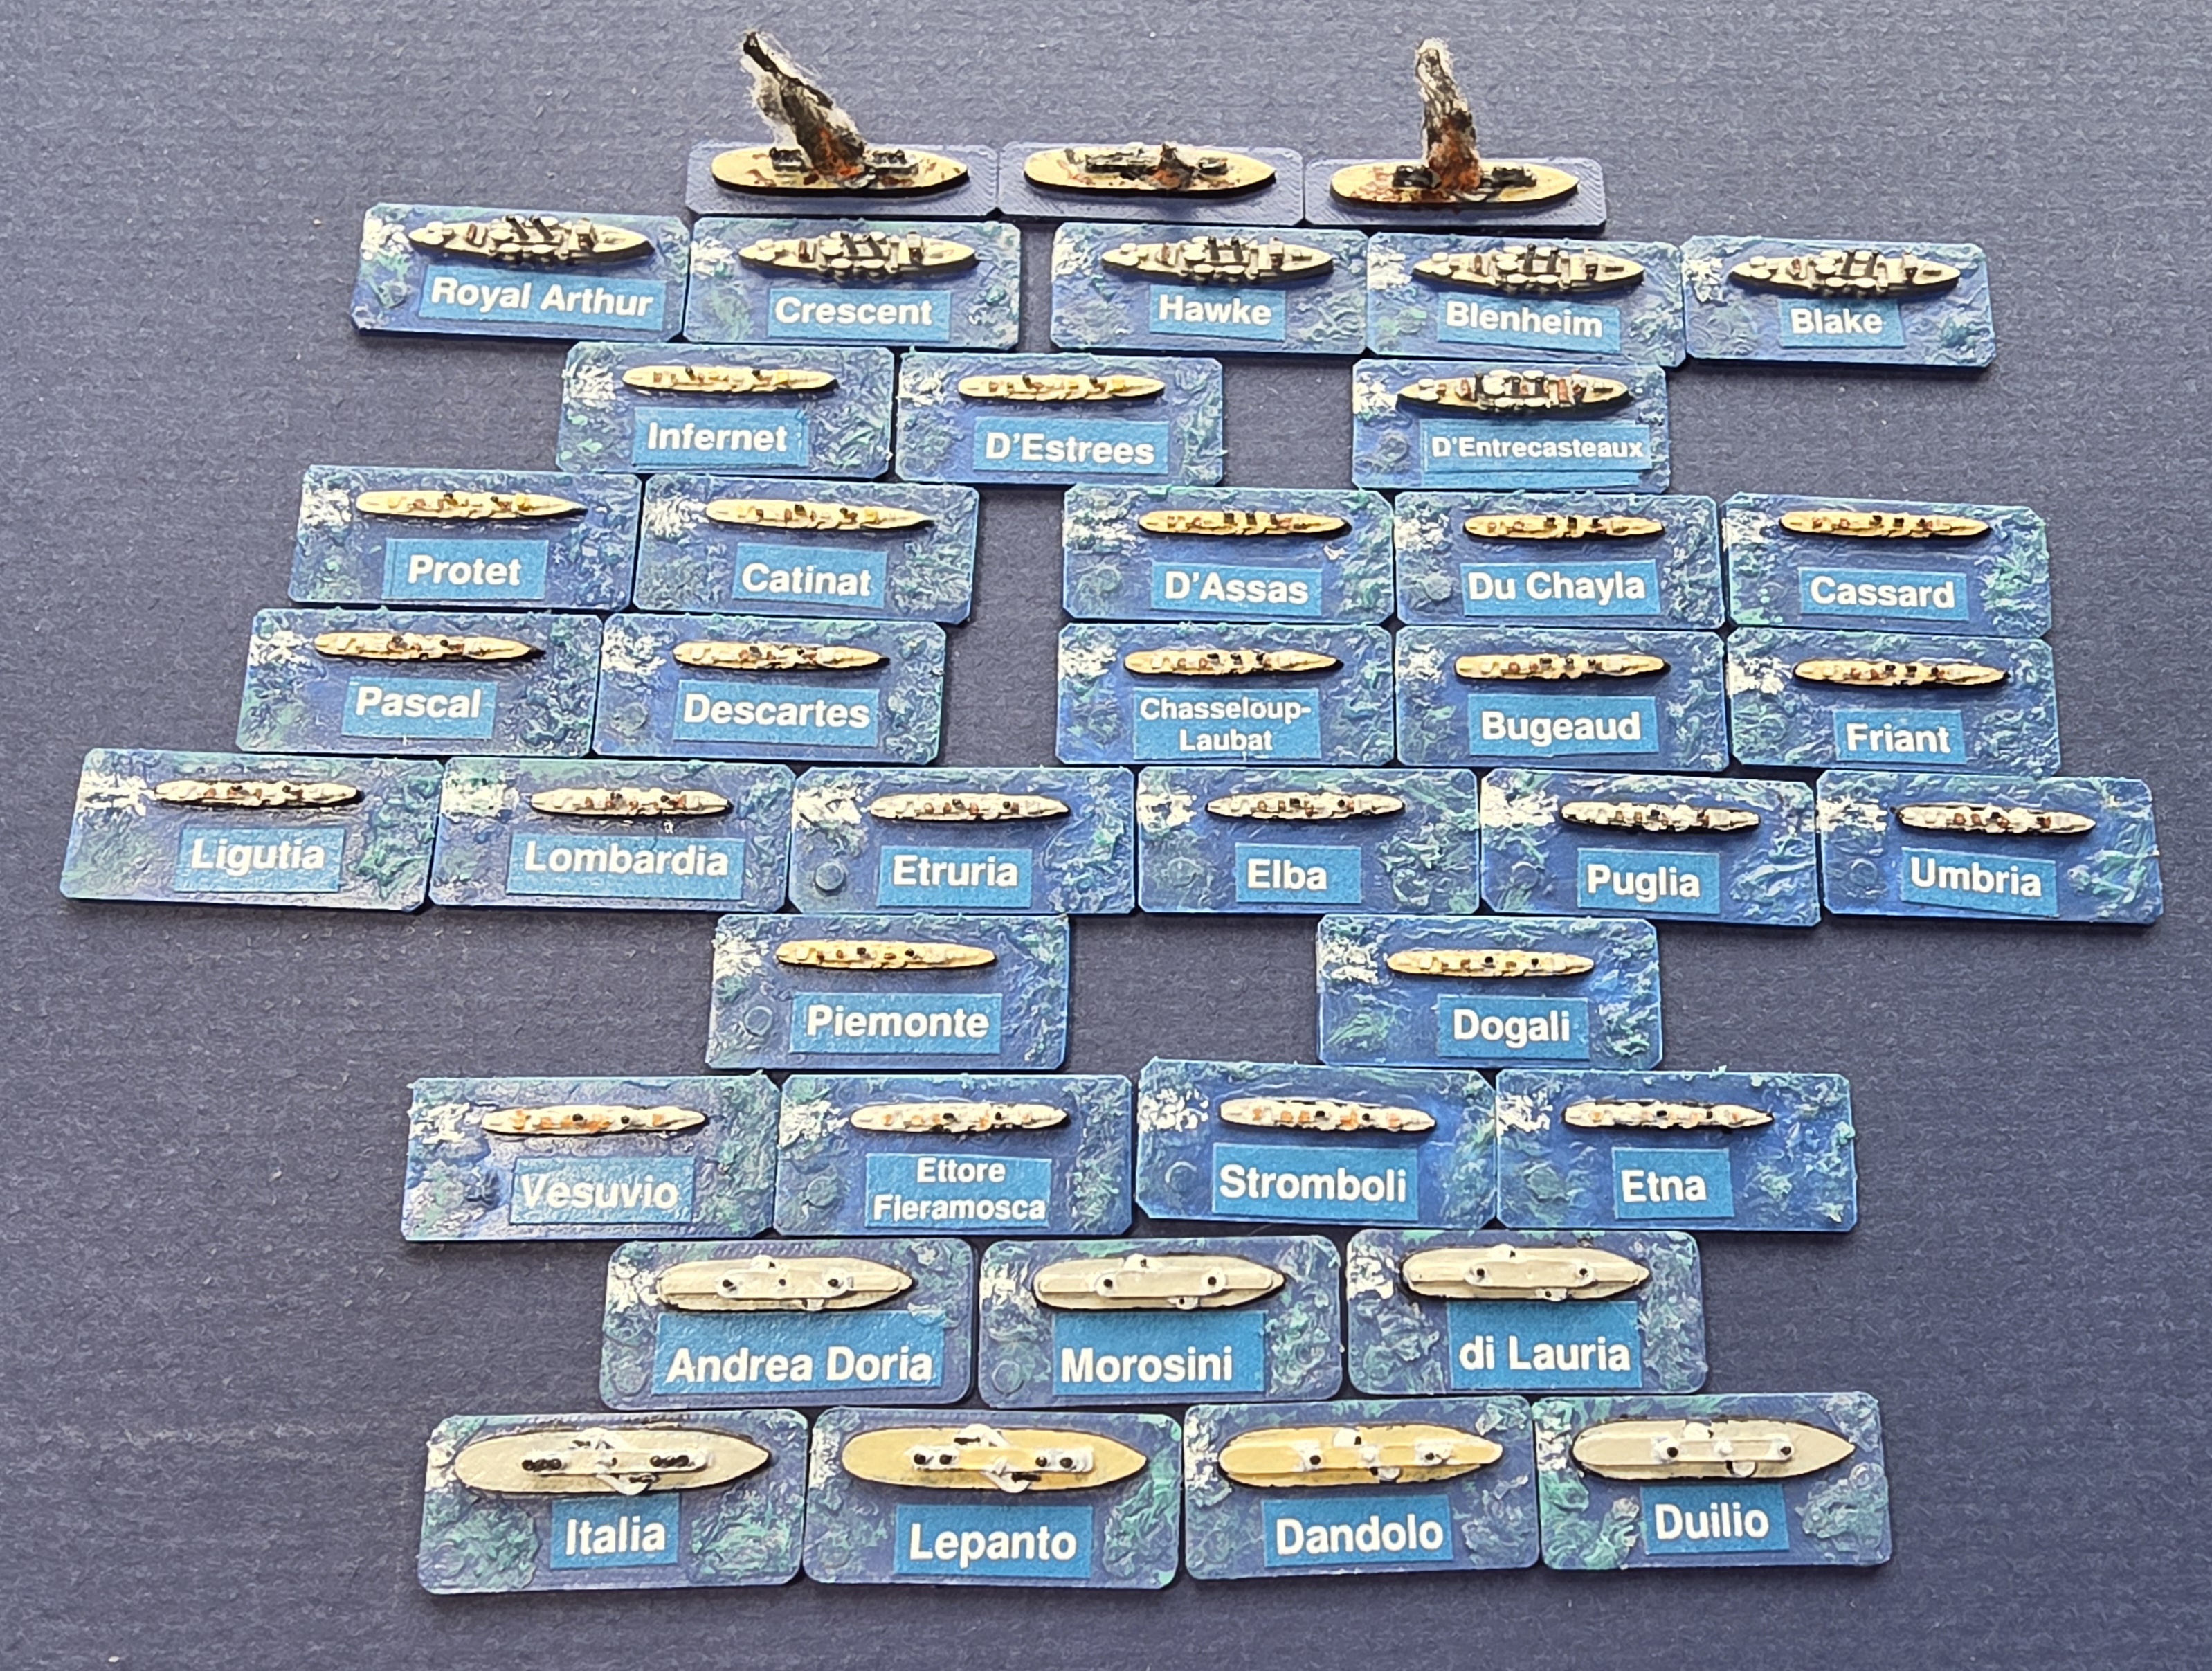
While the French battleships, armored cruisers and their weapons were already included in the game codes, it was necessary to add the Friant class protected cruisers and all of the Italian ships and weapons. Code revisions were required to accommodate the long reload times of the Italian heavy guns. None of the new ships were available in the Figurehead 1:6000 scale line, so they were created by conversions or 3D printing. Small destroyer units (not present in the AOTF game) were added to each fleet.
Both sides were run by the code‘s automation algorithms.
The orders of battle are listed in the narrative file:
Plots:
Full scenario plot:
Simplified plot of battleship movements:
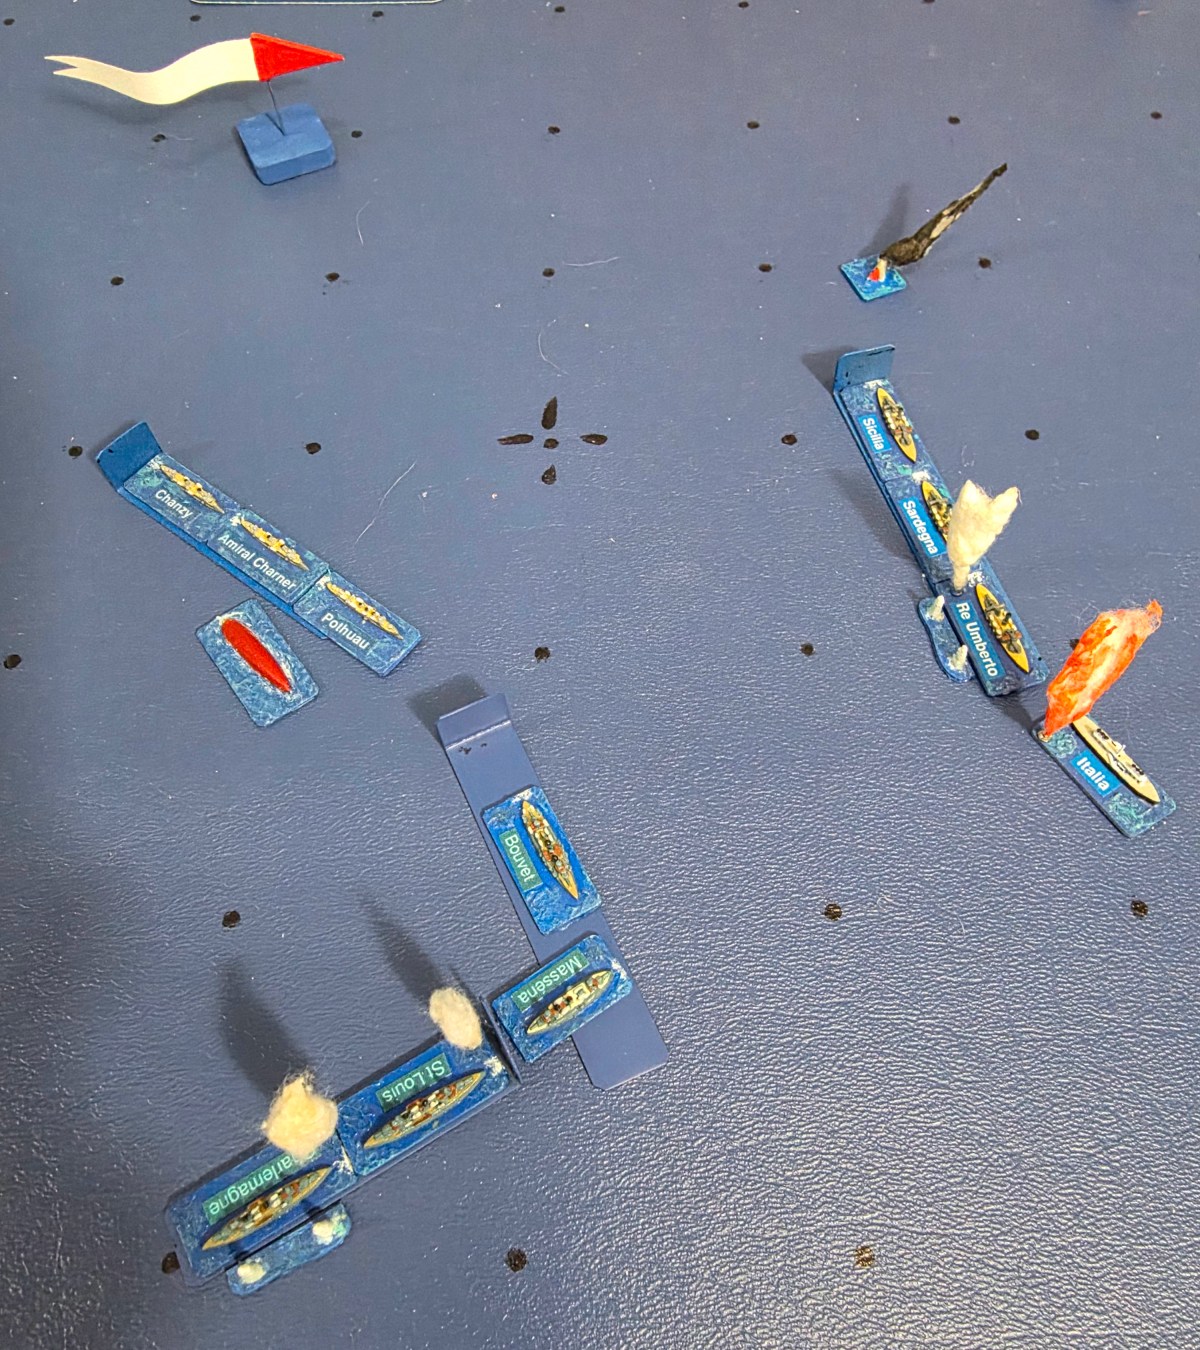
Status at the end of the game:
Gunnery Logs:
Hit Logs:
Comments:
Although neither of the computer-controlled forces had yet chosen to break off the action, the loss of three Italian battleships and the French fleet’s attempt to open the range provided a reasonable opportunity to end the battle after a hour and twenty minutes.
Italian losses were much greater than French, primarily due to the ineffectiveness of the 17 inch guns of the two leading Italian battleships. These guns did not make any hits, with their long reload time (8 minutes) and consequent inability to achieve a good fire control solution. The two ships (Italia, Lepanto) fired only 9 and 8 heavy shells, respectively, so even one hit would have been a good hit rate. Putting the Re Umberto class ships in the van might have had better results, but their 13.5in/30 guns had a maximum rate of fire of only 0.3 rounds per minute, compared to 1 round per minute for the 305mm guns of the French battleships.
The destroyers with their short range torpedoes were of little use in a daylight action. The code algorithms kept them on the disengaged side so that they did not take many hits.


You must be logged in to post a comment.