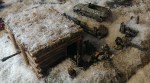
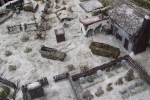
This weekend the local HMGS-South group played a Bolt Action game. German infantry defend a bridge against Soviet tanks, infantry and mortars. The terrain table was by Real Terrain.
Russians on the left must cross the frozen river to take buildings on the right guarding the bridge.
German bunker with AT gun.
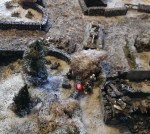
A close range firefight near the bunker results in heavy casualties to both sides.
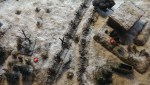
Russian infantry and a tank cross the bridge, but fail to take the objective buildings.
In spite of their AT gun being blocked by smoke for the entire game, the Germans hold the objectives.
This is the second in a series of hypothetical battles based on the implementation of the strategy suggested by Wolfgang Wegener (“The Naval Strategy of the World War“). For a brief description of the Wegener Thesis, see this article.
After taking the Jutland peninsula, the Germans establish a naval base at Frederikshavn. The British send the battle cruisers remaining operational from the previous battle and a supporting battle squadron into the Kattegat to disrupt German mining efforts.
This is the first of a series of hypothetical battles based on the implementation of the strategy suggested by Wolfgang Wegener (“The Naval Strategy of the World War“).
Having failed to defeat France in the campaign of 1914, the Germans invade Denmark as the first step to achieving a geographical position from which a naval war against Britain can be waged. To support the advance of the army north through the Jutland peninsula, the pre-dreadnought squadrons sortie from Kiel to bombard the southern defenses of Aarhus. British intelligence intercepts allow them to send the battle cruiser squadrons into the Kattegat in response.
After 50 minutes of maneuvering, the British established a favorable position to leeward blocking the German retreat. We called the game at that point since it was getting late. We expected many German ships to be destroyed, unless the British lost battlecruisers to magazine explosions. In any case, the German army would get no naval support at Aarhus.
This weekend the local HMGS-South group played a Bolt Action game. German infantry and AT guns, reinforced later by a Tiger, defend a crossroads against Soviet tanks, infantry and mortars. Our host provided a great terrain table as usual.
The Soviets in the foreground need to capture buildings around the crossroads at the upper left.
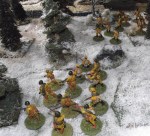
Soviet infantry advance through snowy woods.
Soviet tanks.
Germans hold high ground beyond the crossroads.
A German AT gun is destroyed after taking out just one Soviet tank.
German infantry await a Soviet assault.
A German MG crew and an officer hold off the Soviet left flank.
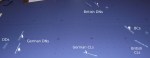
In this hypothetical battle, The German Mediterranean squadron (significantly enlarged from the historical one) is cornered by the British in August 1914.
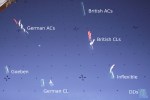
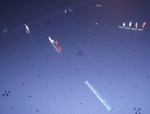
The German squadron heads east out of the Strait of Messina after coaling. Two British battlecruisers pass through the straits and approach from the northwest. Milne, in his flagship Inflexible, approaches from the southeast. The armoured cruisers of the 1st Cruiser Squadron approach from the northeast. The Goeben and the British battlecruisers are limited to 24 knots due to maintenance issues.
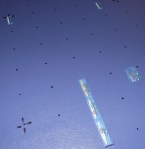
The first photo is well into the game. Two German CLs have been sunk and the British CLs have taken a lot of damage.
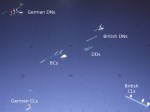
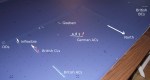
The two British BCs coming from the west steam at their maximum speed to catch up.
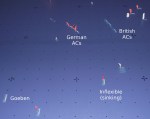
Under fire from four British ACs and two BCs (out of the photo to the west), the German ACs take heavy damage.
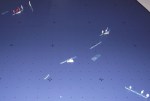
Goeben escapes to the south.
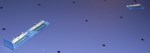
The Inflexible is sunk by the Goeben, allowing her to escape to the south with little damage. The German cruisers are all sunk and the British also lose one armoured cruiser.
Milne is posthumously hailed as a hero, and the Goeben reaches Turkey to play her historical role there.


You must be logged in to post a comment.