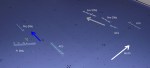
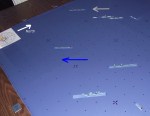
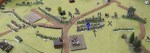
The Austrians round the islands NW of Corfu and the French intercept.
The Austrians turn west and the French reverse course.
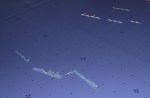
The leading French dreadnought is heavily hit and slows, throwing the division into confusion. It also throws the moderator into confusion since he could not remember how to force the code to transfer the division flag.
The Austrians dreadnoughts have a lot of guns out of action in the later turns, and SMS Tegetthoff sinks. Yellow and red markers indicate medium and heavy damage.
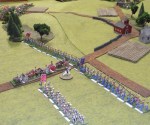
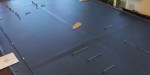
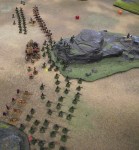
This weekend the local HMGS-South group played an ACW game at the Dogs of War shop using the Fire and Fury rules. It was a test game to learn the rules in preparation for a campaign. Each side had three players, two commanding infantry divisions and one commanding a cavalry division. Each division had three brigades of randomly determined size. Each side also had four artillery units.
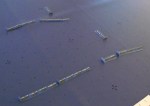
Troops enter the field. Both commanders have deployed their cavalry on their own right.
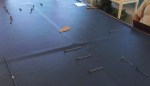
Confederate infantry advances in the center.
Union infantry advances in double line.
Confederate cavalry attempts to move around the Union left.
A Union charge drives back a Confederate infantry brigade. To the left a firefight starts which will last several turns.
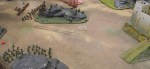
A Confederate infantry charge forces the Union brigade back where it is exposed to a flank attack by cavalry.
Confederate cavalry in a mounted charge into the flank of a disordered Union brigade is so successful that the cavalry is required to continue into a battery. The battery is captured, but the cavalry is left exposed to overwhelming Union fire.
The Confederate cavalry gets a ‘Tardy’ command result (halving movement) and charges the Union unit to the front. The move choice is irrelevant since Union defensive fire destroys it in its initial location.
Another Confederate charge forces back a Union brigade. Dismounted Union cavalry advances on the far left.
The battle was still about even when we ran out of time.
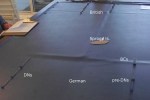
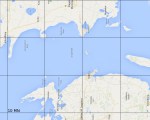
In this fictional battle using the WWI naval game program, two players commanded British and German fleets in August 1914. The scenario was an attempt by the Grand Fleet to enter the Baltic Sea as part of one of Admiral Fisher’s schemes. The Germans manage to move some High Seas Fleet ships through the Kiel Canal and link up with old pre-dreadnoughts of the 4th and 5th Battle squadrons already operating in the Baltic. The fleets meet in the 10 nautical mile wide Great Belt near Nyborg Denmark.
The British organization is based on this list. The 4th BS (three battleships) has turned back due to mine damage. The flagship Iron Duke is attached to the 1st Battle Squadron replacing Colossus. The tactic of using pre-dreadnoughts as ‘mine bumpers’ in front of the fleet is from Usborne, “Blast and Counterblast.”
The German organization is based on this list. The flagship Friedrich der Grosse is attached to the 3rd Battle Squadron.
North is to the left. A subdivision of pre-dreadnoughts leads each British column.
Looking north. The long edges of the table (right and left in this photo) are shallow water.
The Germans (foreground) attempt to link their forces.
The British pre-dreadnoughts turn out of line and are sent to the rear.
German battlecruisers and British dreadnoughts engage at close range.
British 1st Battle Squadron. These closeups were taken after the battle in more controlled lighting.
British 2nd Battle Squadron
British battlecruisers
British pre-dreadnoughts
German battlecruisers
German dreadnoughts
German pre-dreadnoughts
After 8 turns (40 minutes) the game was ended due to time constraints. Since the close range firing of the last few turns had not resulted in the expected carnage, the program’s hit probability range modifiers will be examined and possibly adjusted.
After the game, the program was used to continue the battle (without the players or the miniatures). On the next turn (Turn 9) a German battlecruiser received 12 additional hits and sank. With her last few shells she blew up a British dreadnought (turret hit followed by magazine explosion). Within 3 turns the remaining two German battlecruisers had also sunk. After 8 additional turns the ship data was: Belt2 IO Data 16end
This weekend the local HMGS-South group played a Northwest Frontier game at the Dogs of War shop using The Sword and the Flame colonial rules, Revision 1.
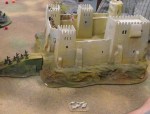
June 1882, near Black Mountain on the east side of the Indus valley. The pass below Black Mountain is blocked by a hostile tribe in a fort. The following British forces were ordered to take the fort. The fort was hand-made by Ian Weekley.
B Company, 2nd Gurkha Rifles
Detachment of the 19th Bengal Lancers Royal Artillery with Gatling gun Indian Artillery with mountain gun
The British deploy. A Pathan unit appears outside the fort. The fort was built by Ian Weekley.
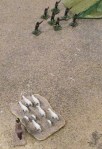
Gurkha deployed in open order
Russian ‘observers’ are sent out of the fort, but are quickly shot down by the Gurkhas.
The rough ground is scouted. The Royal Artillery crew of the Gatling (on the elephants) is wiped out by the fort’s gun.
More Pathans appear to reinforce the fort.
In spite of heavy casualties, Gurkhas advance toward the gate.
Gurkha firing lines trade shots and casualties with Pathans on the walls. The Bengal lancers, in near mutiny, refuse to advance.
The gate is blown open. The defending Pathan units fail their tests when charged and the fort is taken.
The Pathan leader sneaks out and pretends to be a sheepherder.


You must be logged in to post a comment.