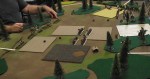
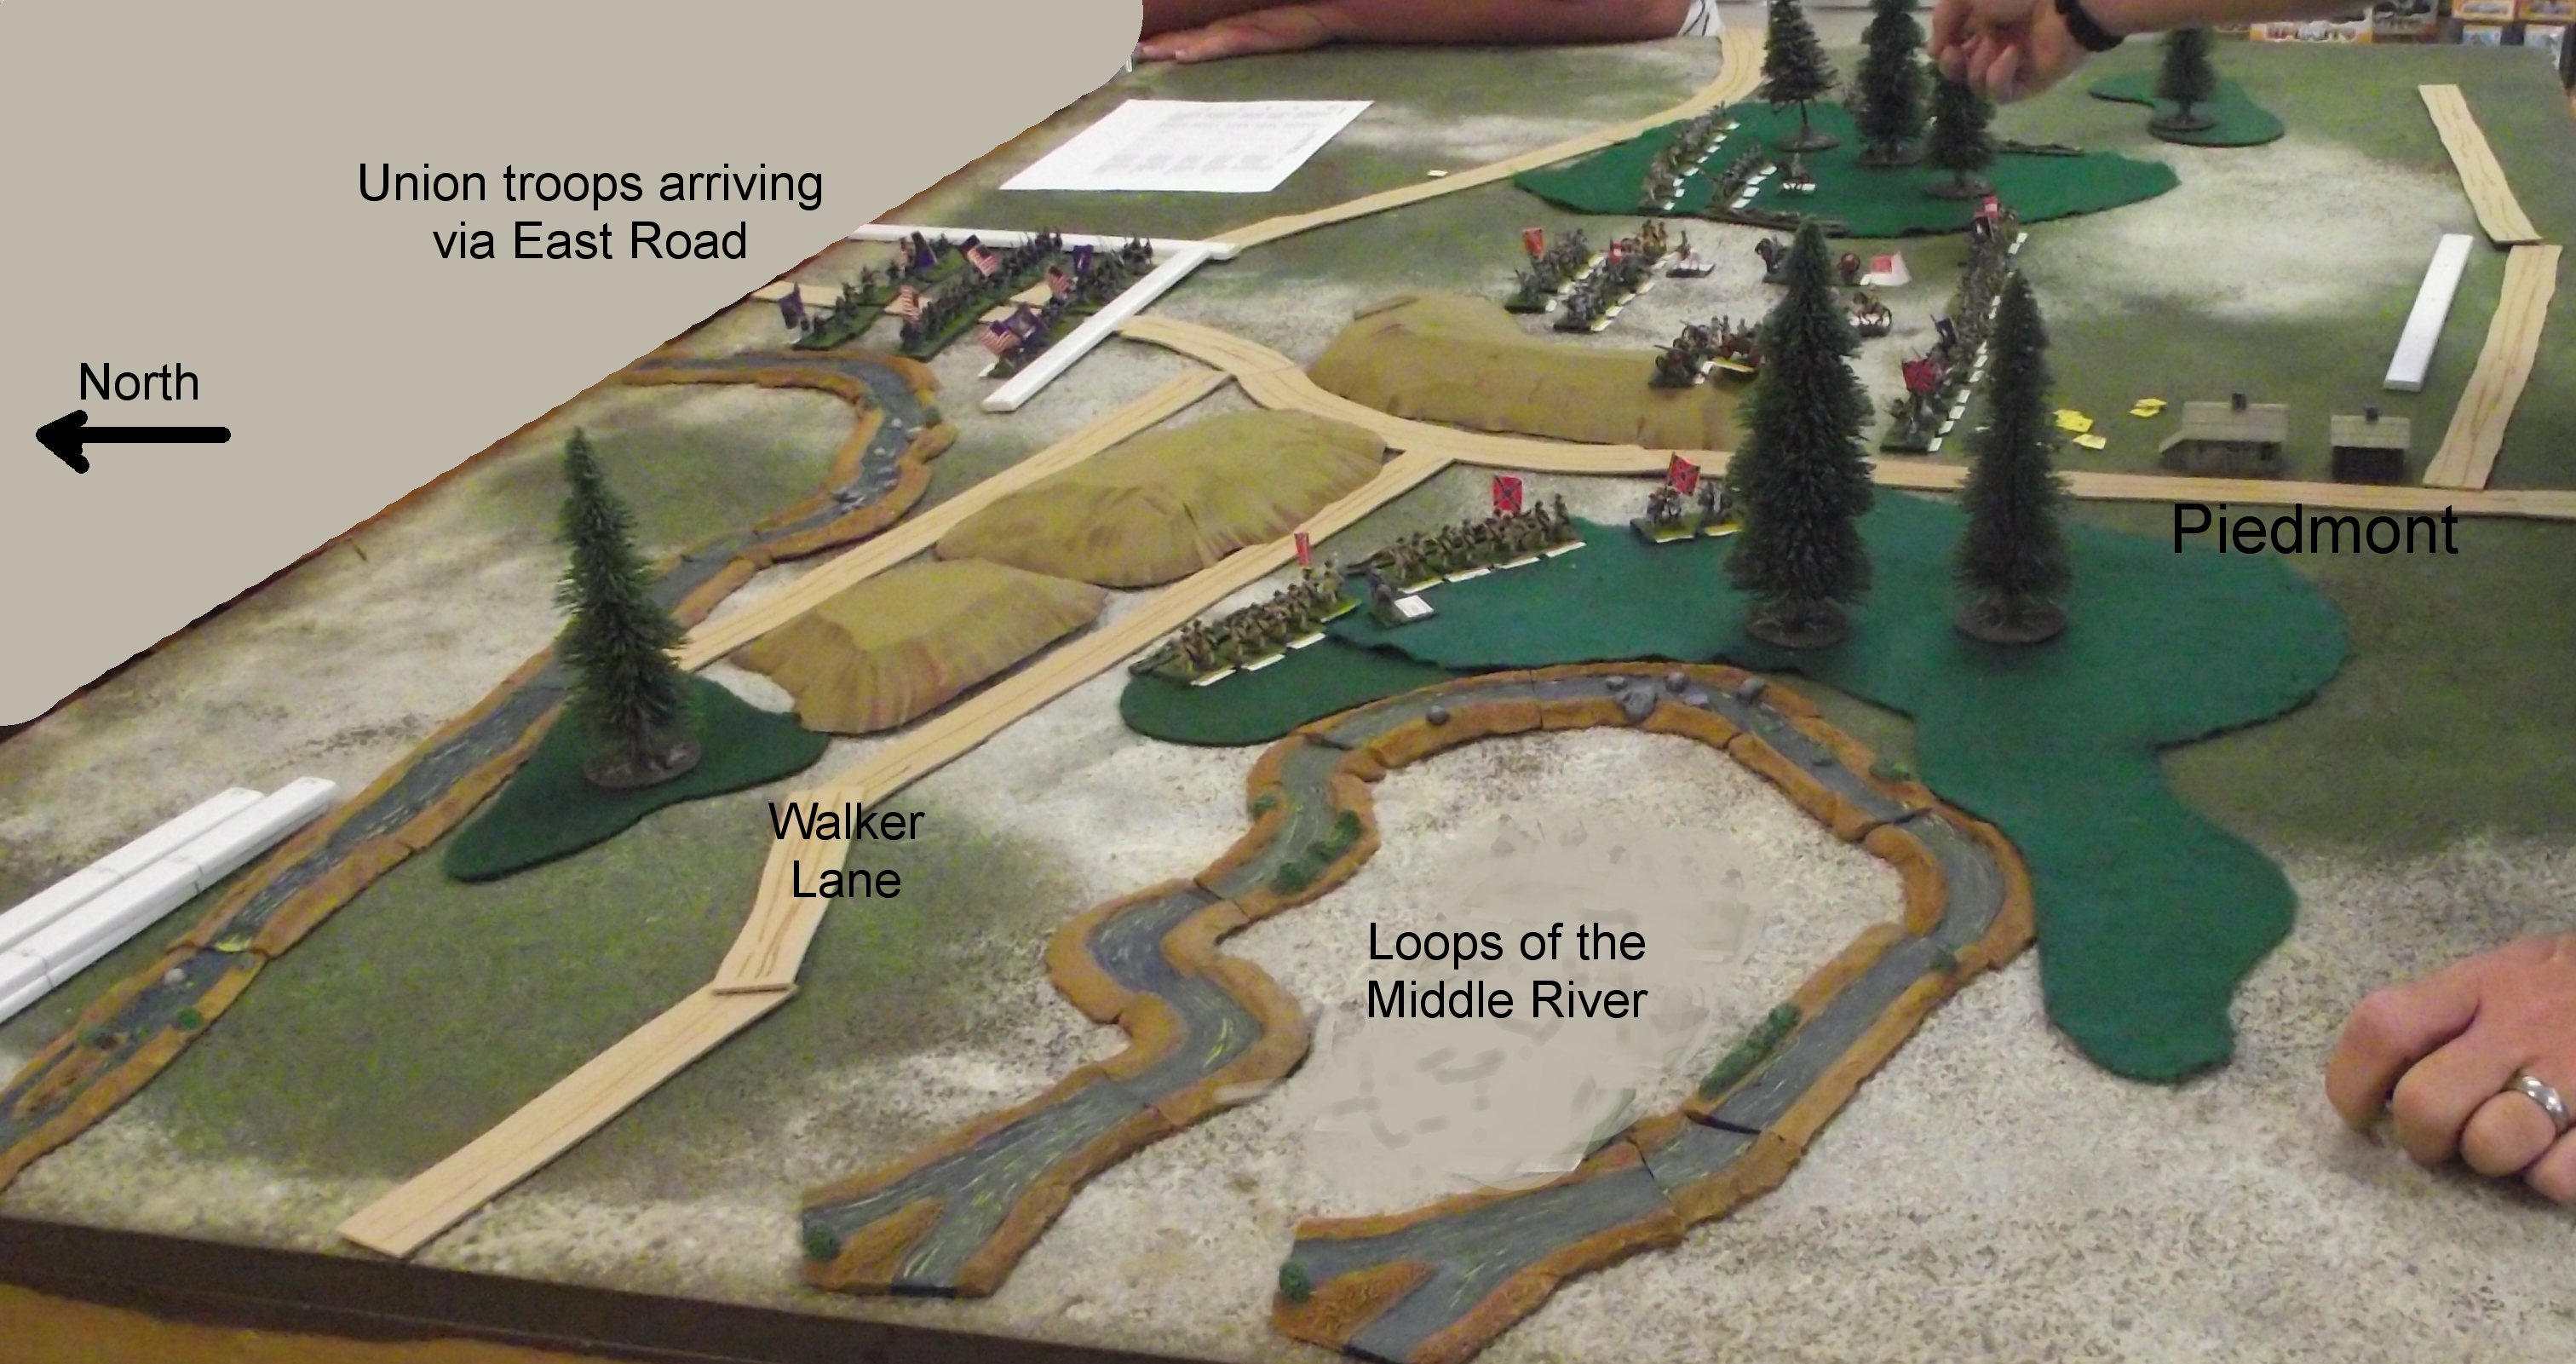
Saturday the local HMGS-South group played a game of Black Powder at the Dogs of War shop. The ACW scenario was based loosely on the action at Fox Gap, South Mountain on September 14, 1862. The scenario was adjusted to accommodate the available 15mm units and the variable number of players expected to show up.
Two Union brigades look across the fields at the defending Confederate brigade
The Union objectives are the confederate position (upper right) and the road junction (lower right).
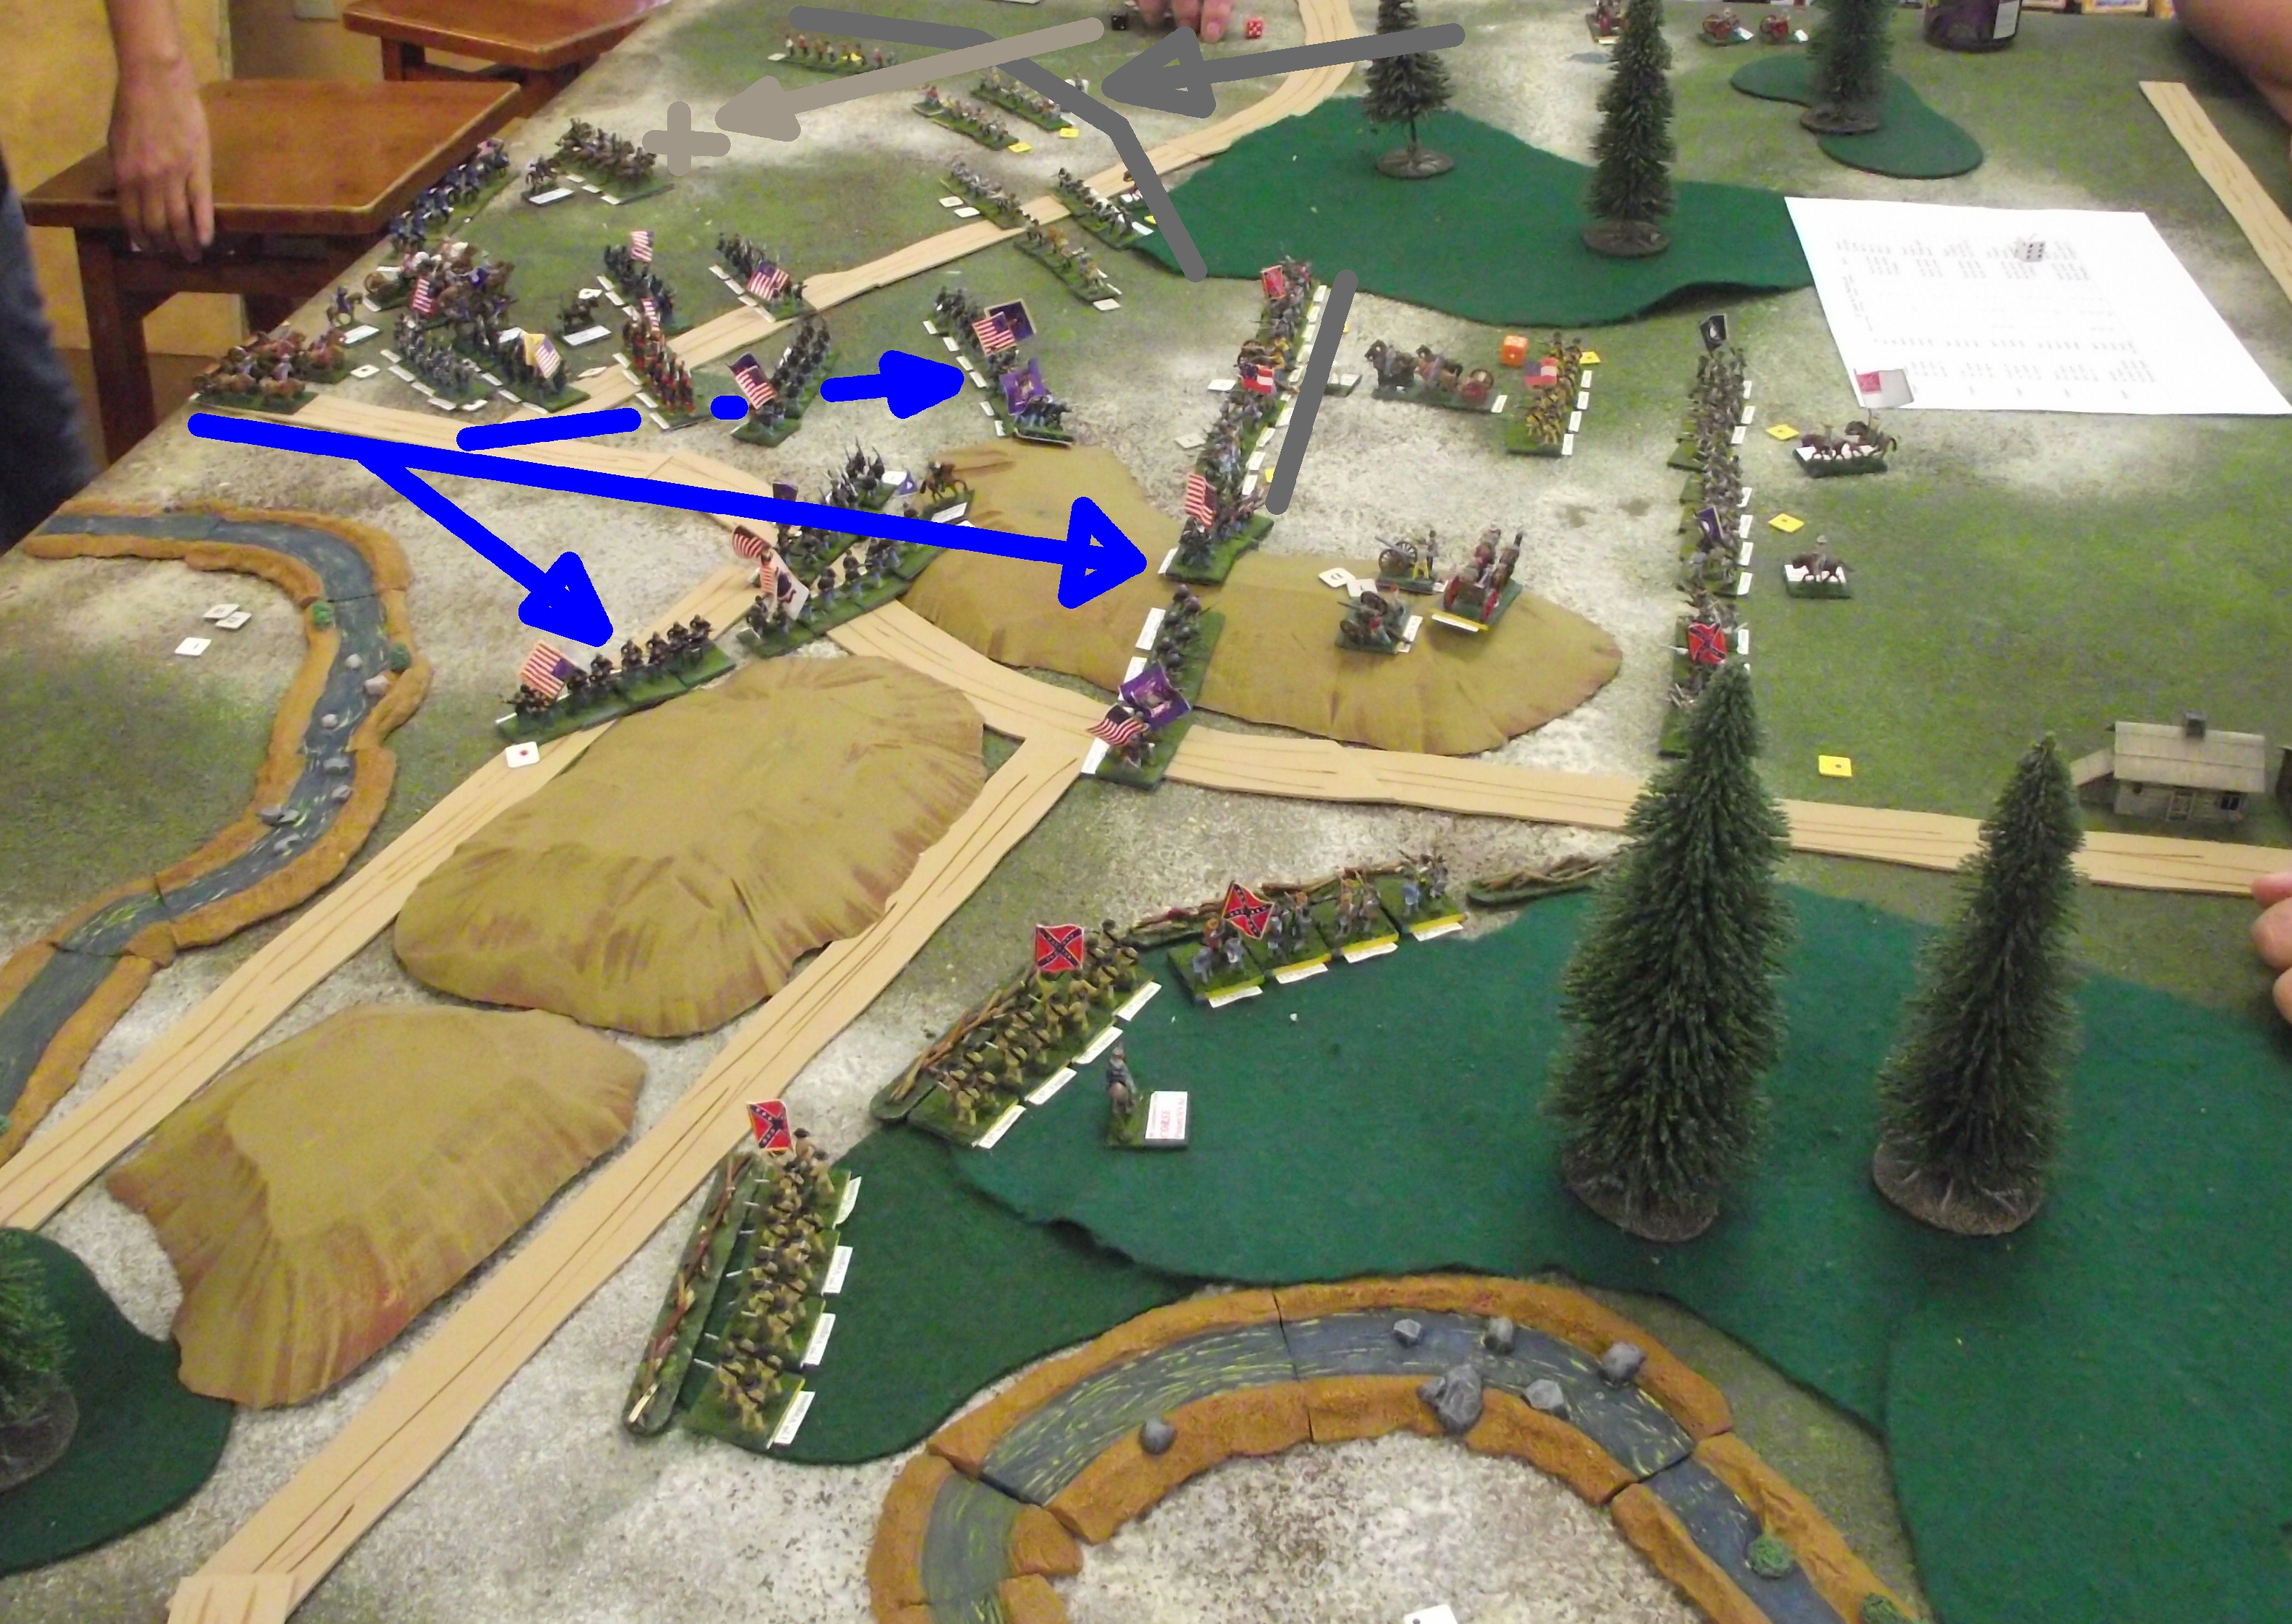
The left Union brigade moves out rapidly.
The Union advance on the left has stalled just inside the range of Confederate guns. The center brigade moves slowly through the standing corn.
A third Union brigade rushes down the turnpike to block an arriving Confederate brigade.
The center Union brigade advances rapidly to catch up with the left.
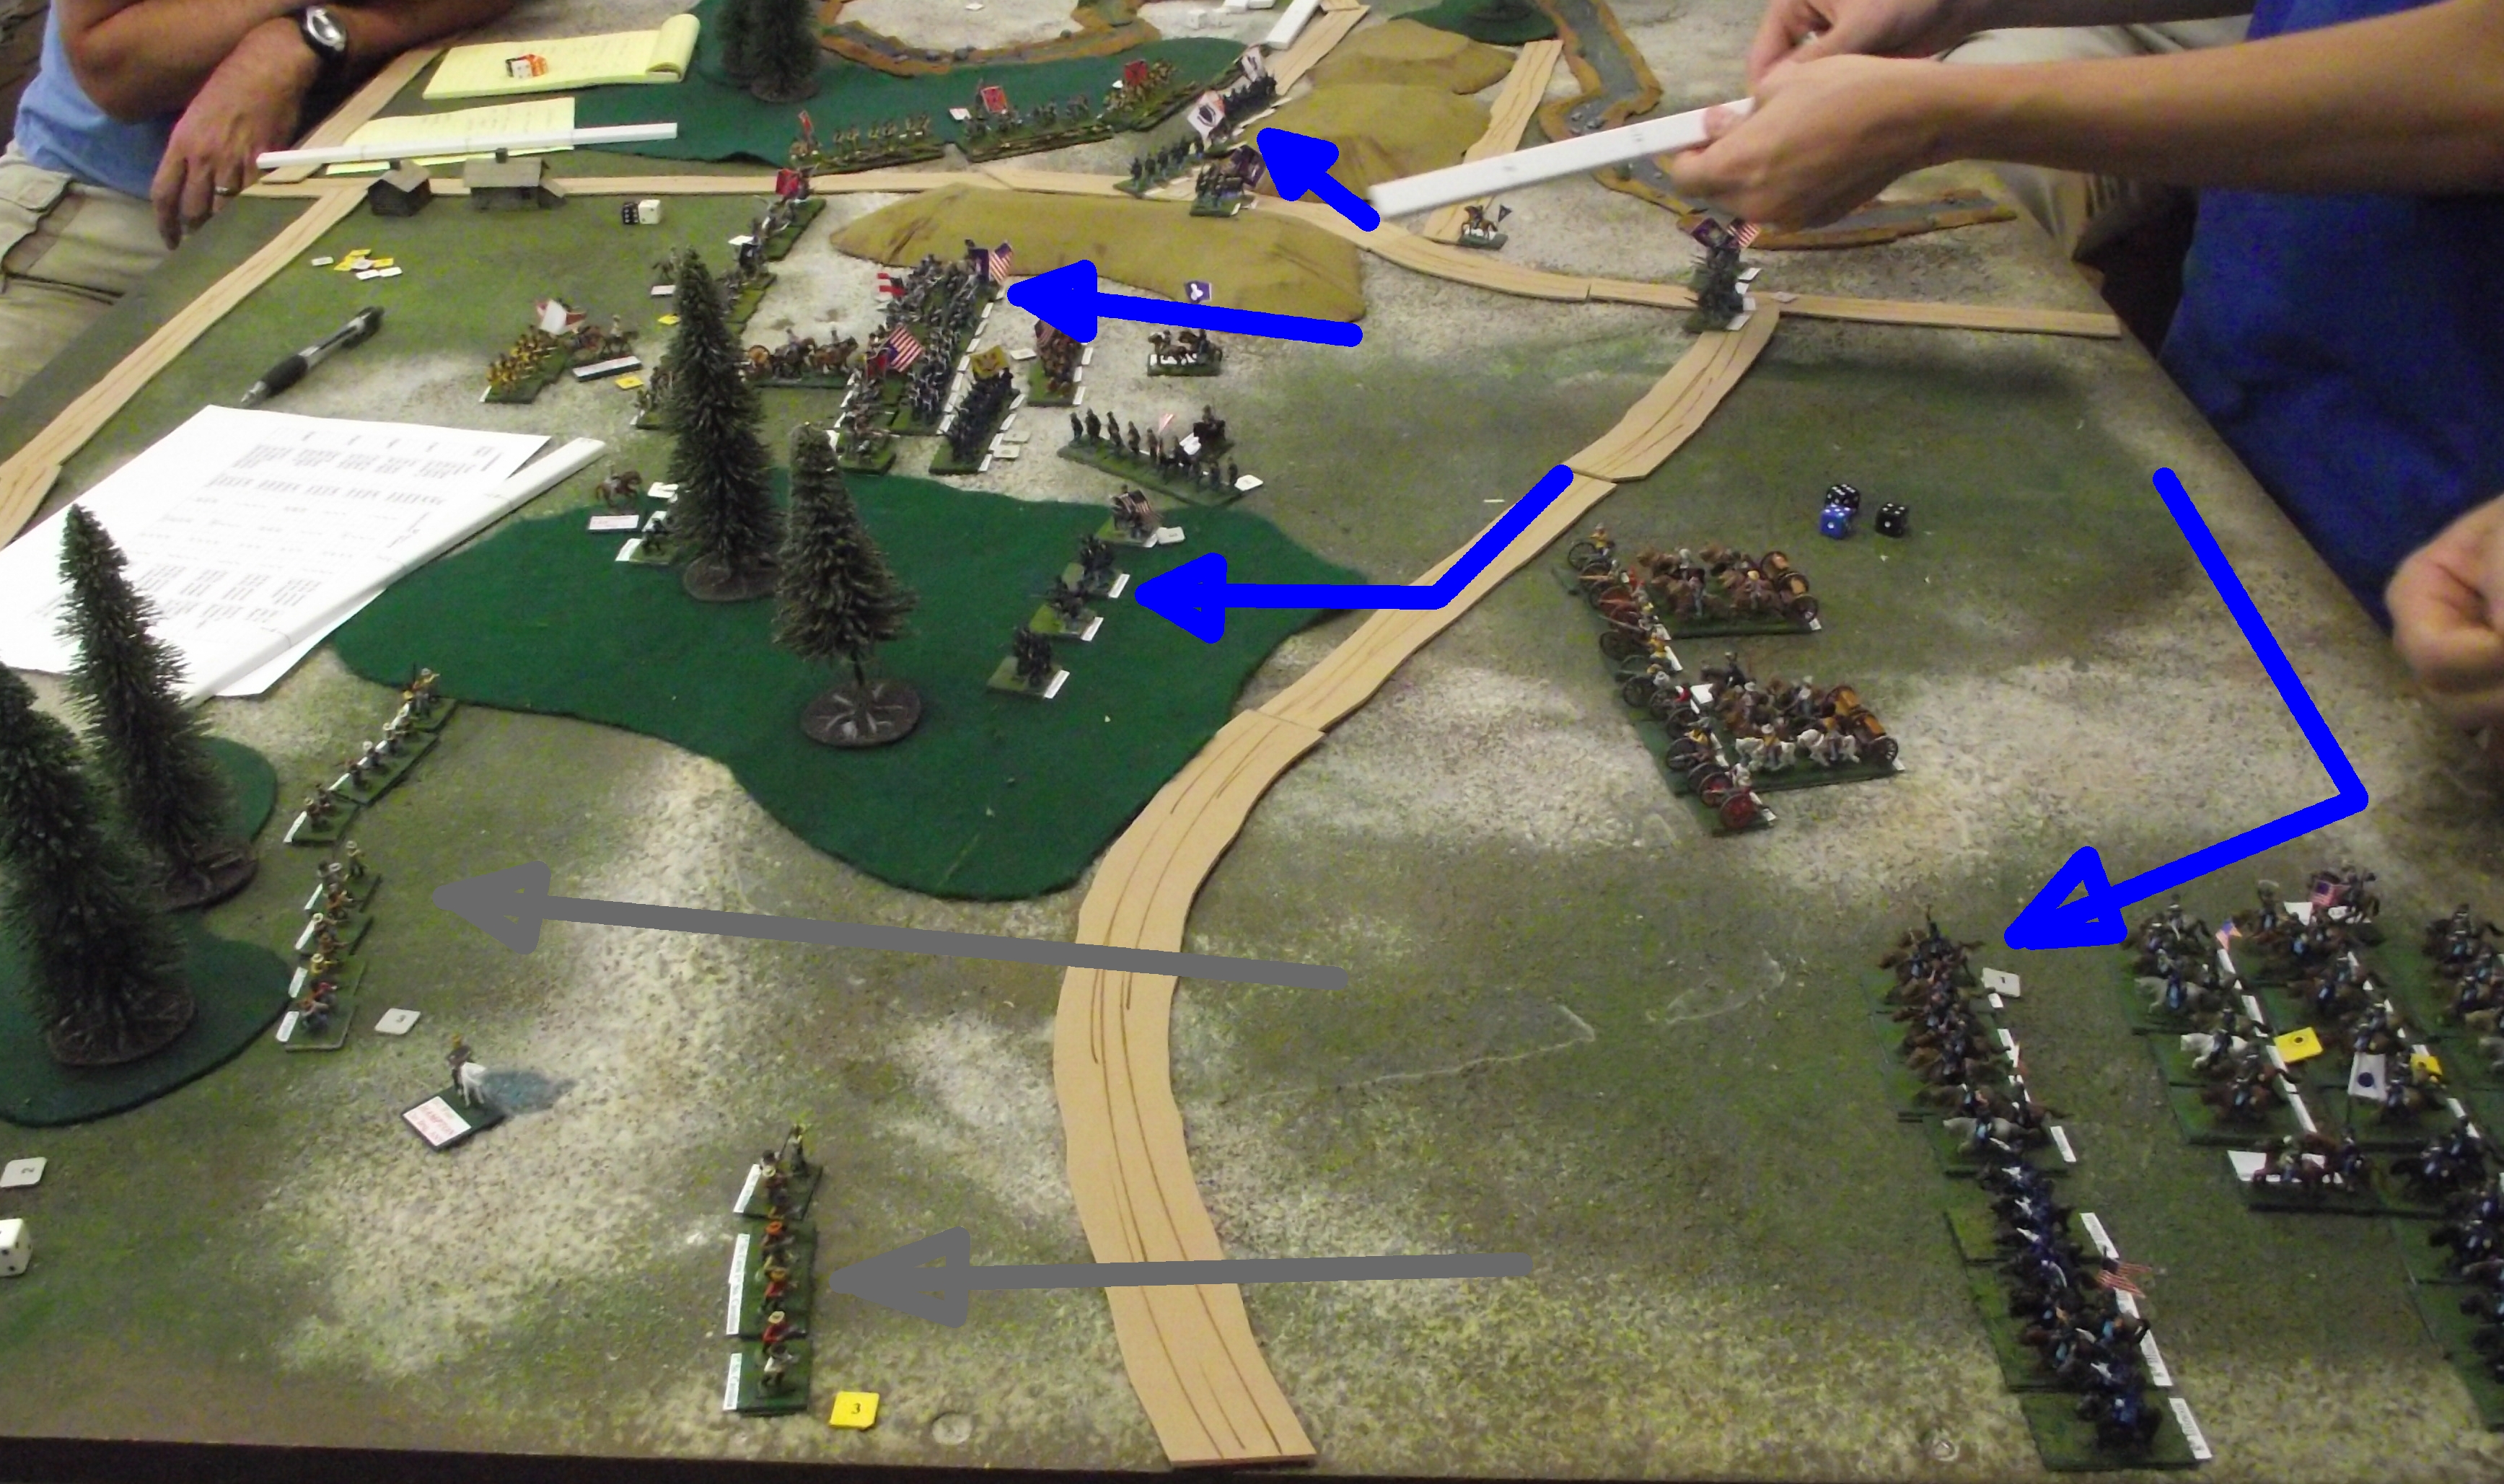
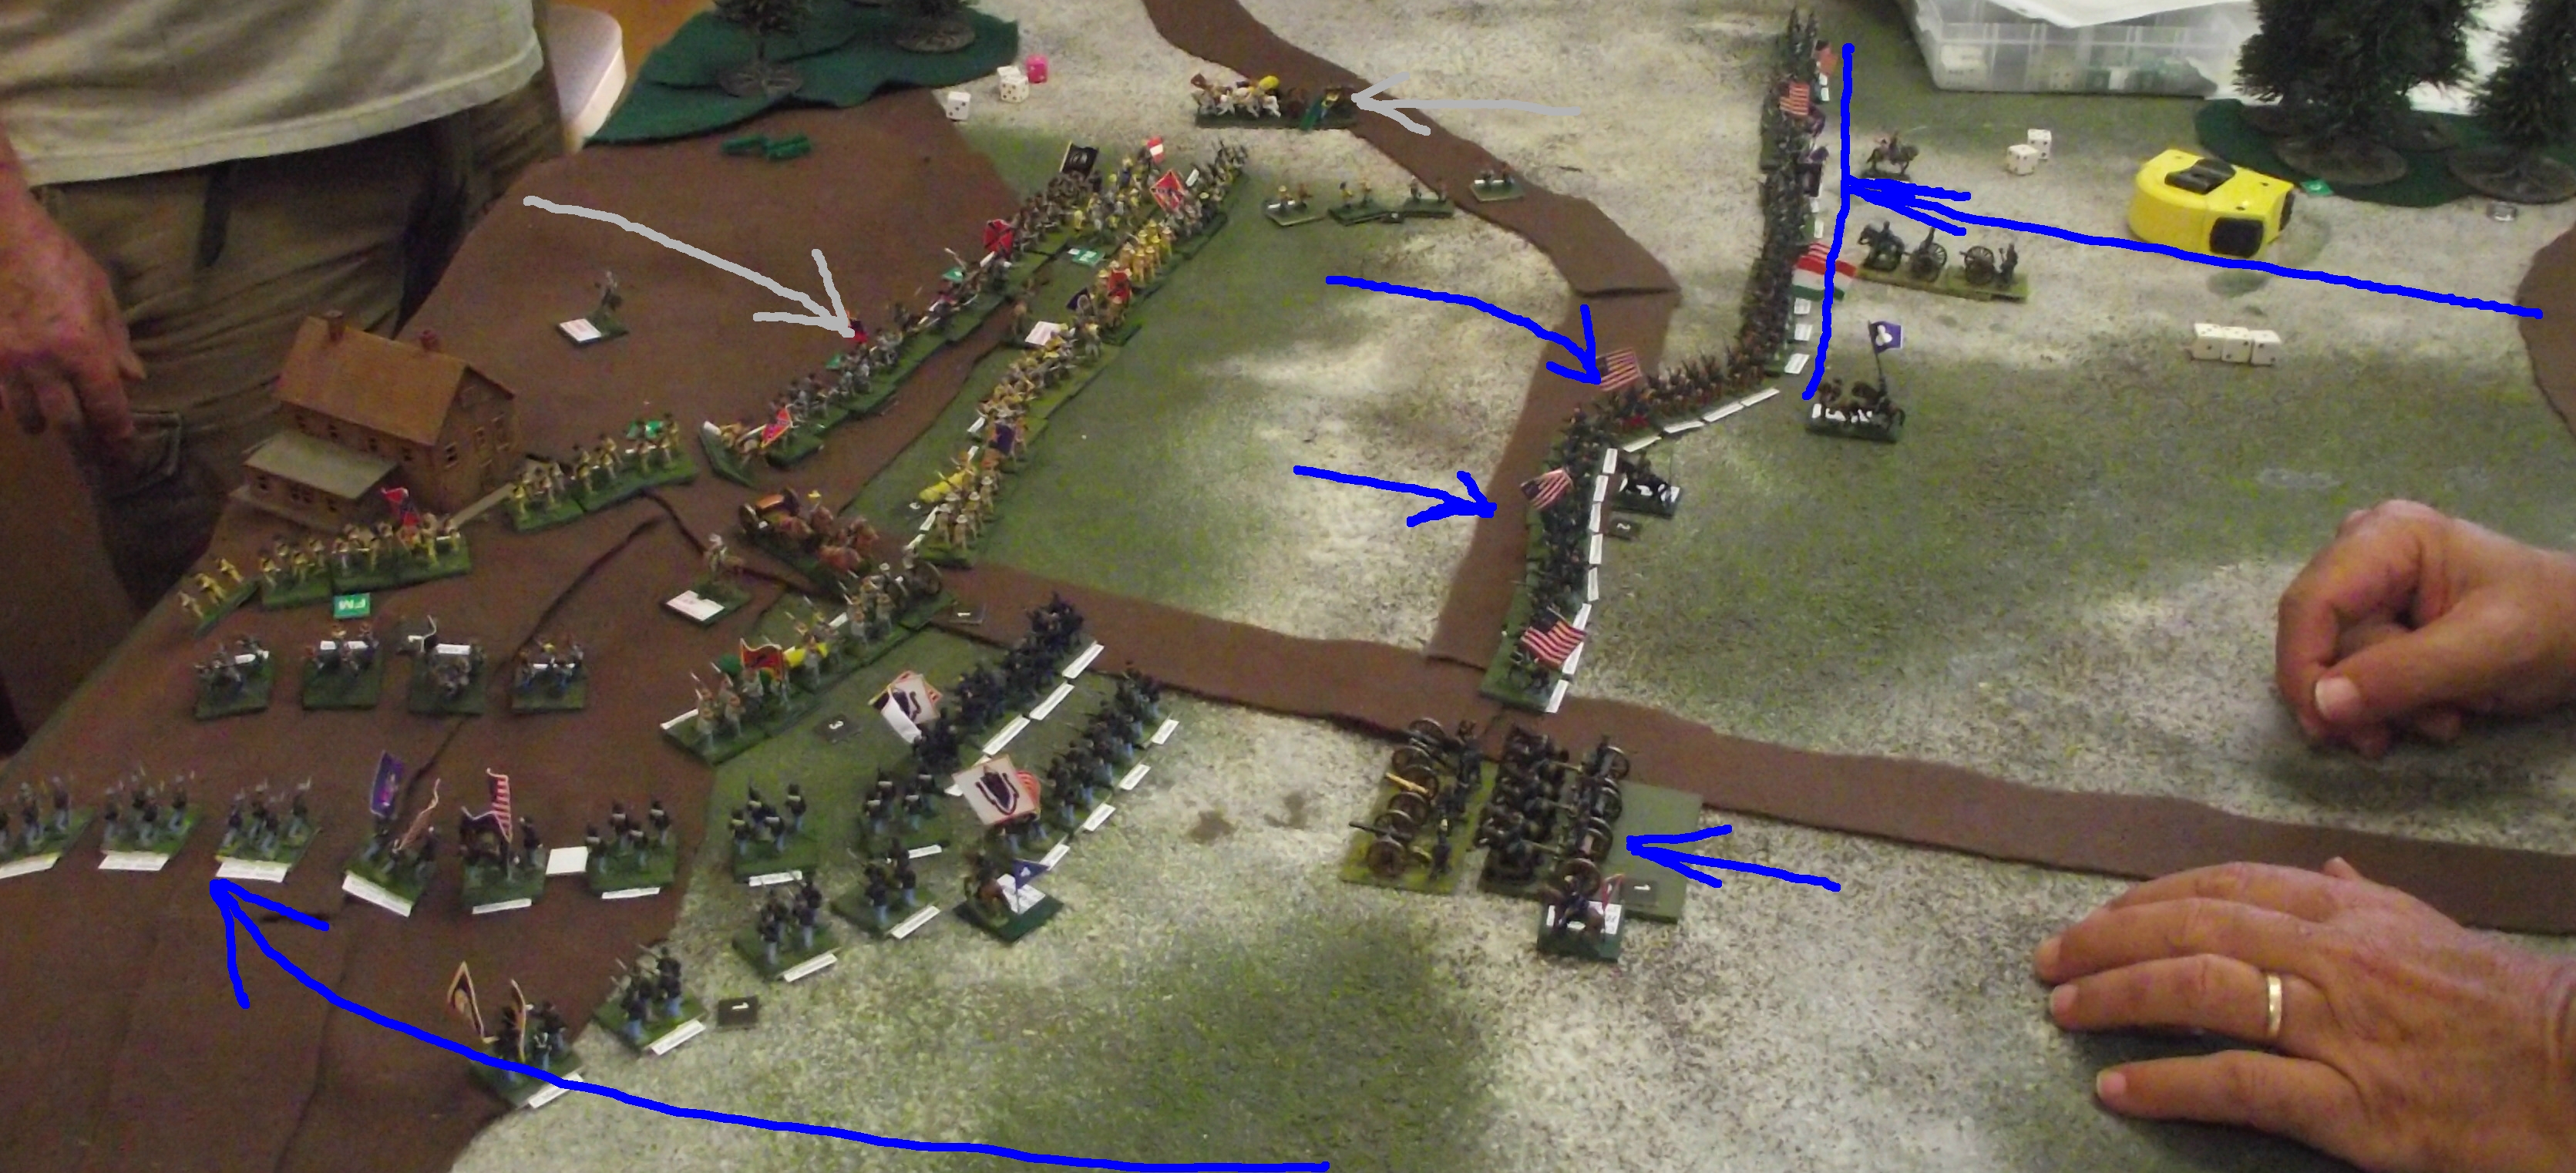
Marauding Confederate cavalry threaten the Union guns.
Union infantry charges into the Confederate position.
The left Union brigade losses three regiments and is broken. The center brigade tears a hole in the Confederate lines.
On the turnpike, troops of both sides extend the firing line as they come up.
After four hours of play we had to adjourn. The Union had managed to break into the Confederate position in the center, but with one Union brigade broken and the Confederates strongly holding the turnpike objective, we called this a Confederate win.
On Saturday the local HMGS-South group played an American Civil War game at the Dogs of War shop. The rules were Black Powder and the scenario was based on the Battle of Piedmont, June 5th 1864.
In the actual battle, the Confederate infantry formed behind the ridge along Walker Lane and later fell back to barricades in the woods behind. The players were allowed a free setup (still in progress in this photo) and placed the bulk of their infantry and guns to the east of East Road, covering the gap between the two main wooded areas. Confederate cavalry were deployed to the east of the eastern woods.
Union infantry advance to engage at close musket range. Two regiments bypass the Confederate infantry line to threaten the guns on the ridge. In the distance, Confederate cavalry have dismounted and advance on the Union left flank. A Confederate horse battery advanced beyond the lines and was destroyed by a Union mounted charge.
View from the east, Union cavalry move to find room to deploy on the east flank. Union artillery are firing on the Confederate dismounted cavalry. On the ridge, a Confederate battery is destroyed by an infantry charge.
Union cavalry have formed for a grand advance, but poor command rolls delay movement. The Union artillery pounds the right of the Confederate line, but the dismounted cavalry retire in good order. A Confederate cavalry brigade in the woods has broken and retired. The Union infantry forces the Confederate center back, but takes heavy casualties.
The Confederates avoided the rout of the historical battle, while taking significant losses in cavalry and artillery. The Union side was hampered by the cramped deployment area, but attacked boldly in spite of heavy losses in infantry.
On Saturday the local HMGS-South group played an American Civil War game at the Dogs of War shop. The rules were Black Powder and the scenario (modified from Johnny Reb) was based on the action at Salem Church during the battle of Chancellorsville.
The 15mm figures used were generously donated to several Florida HMGS groups.
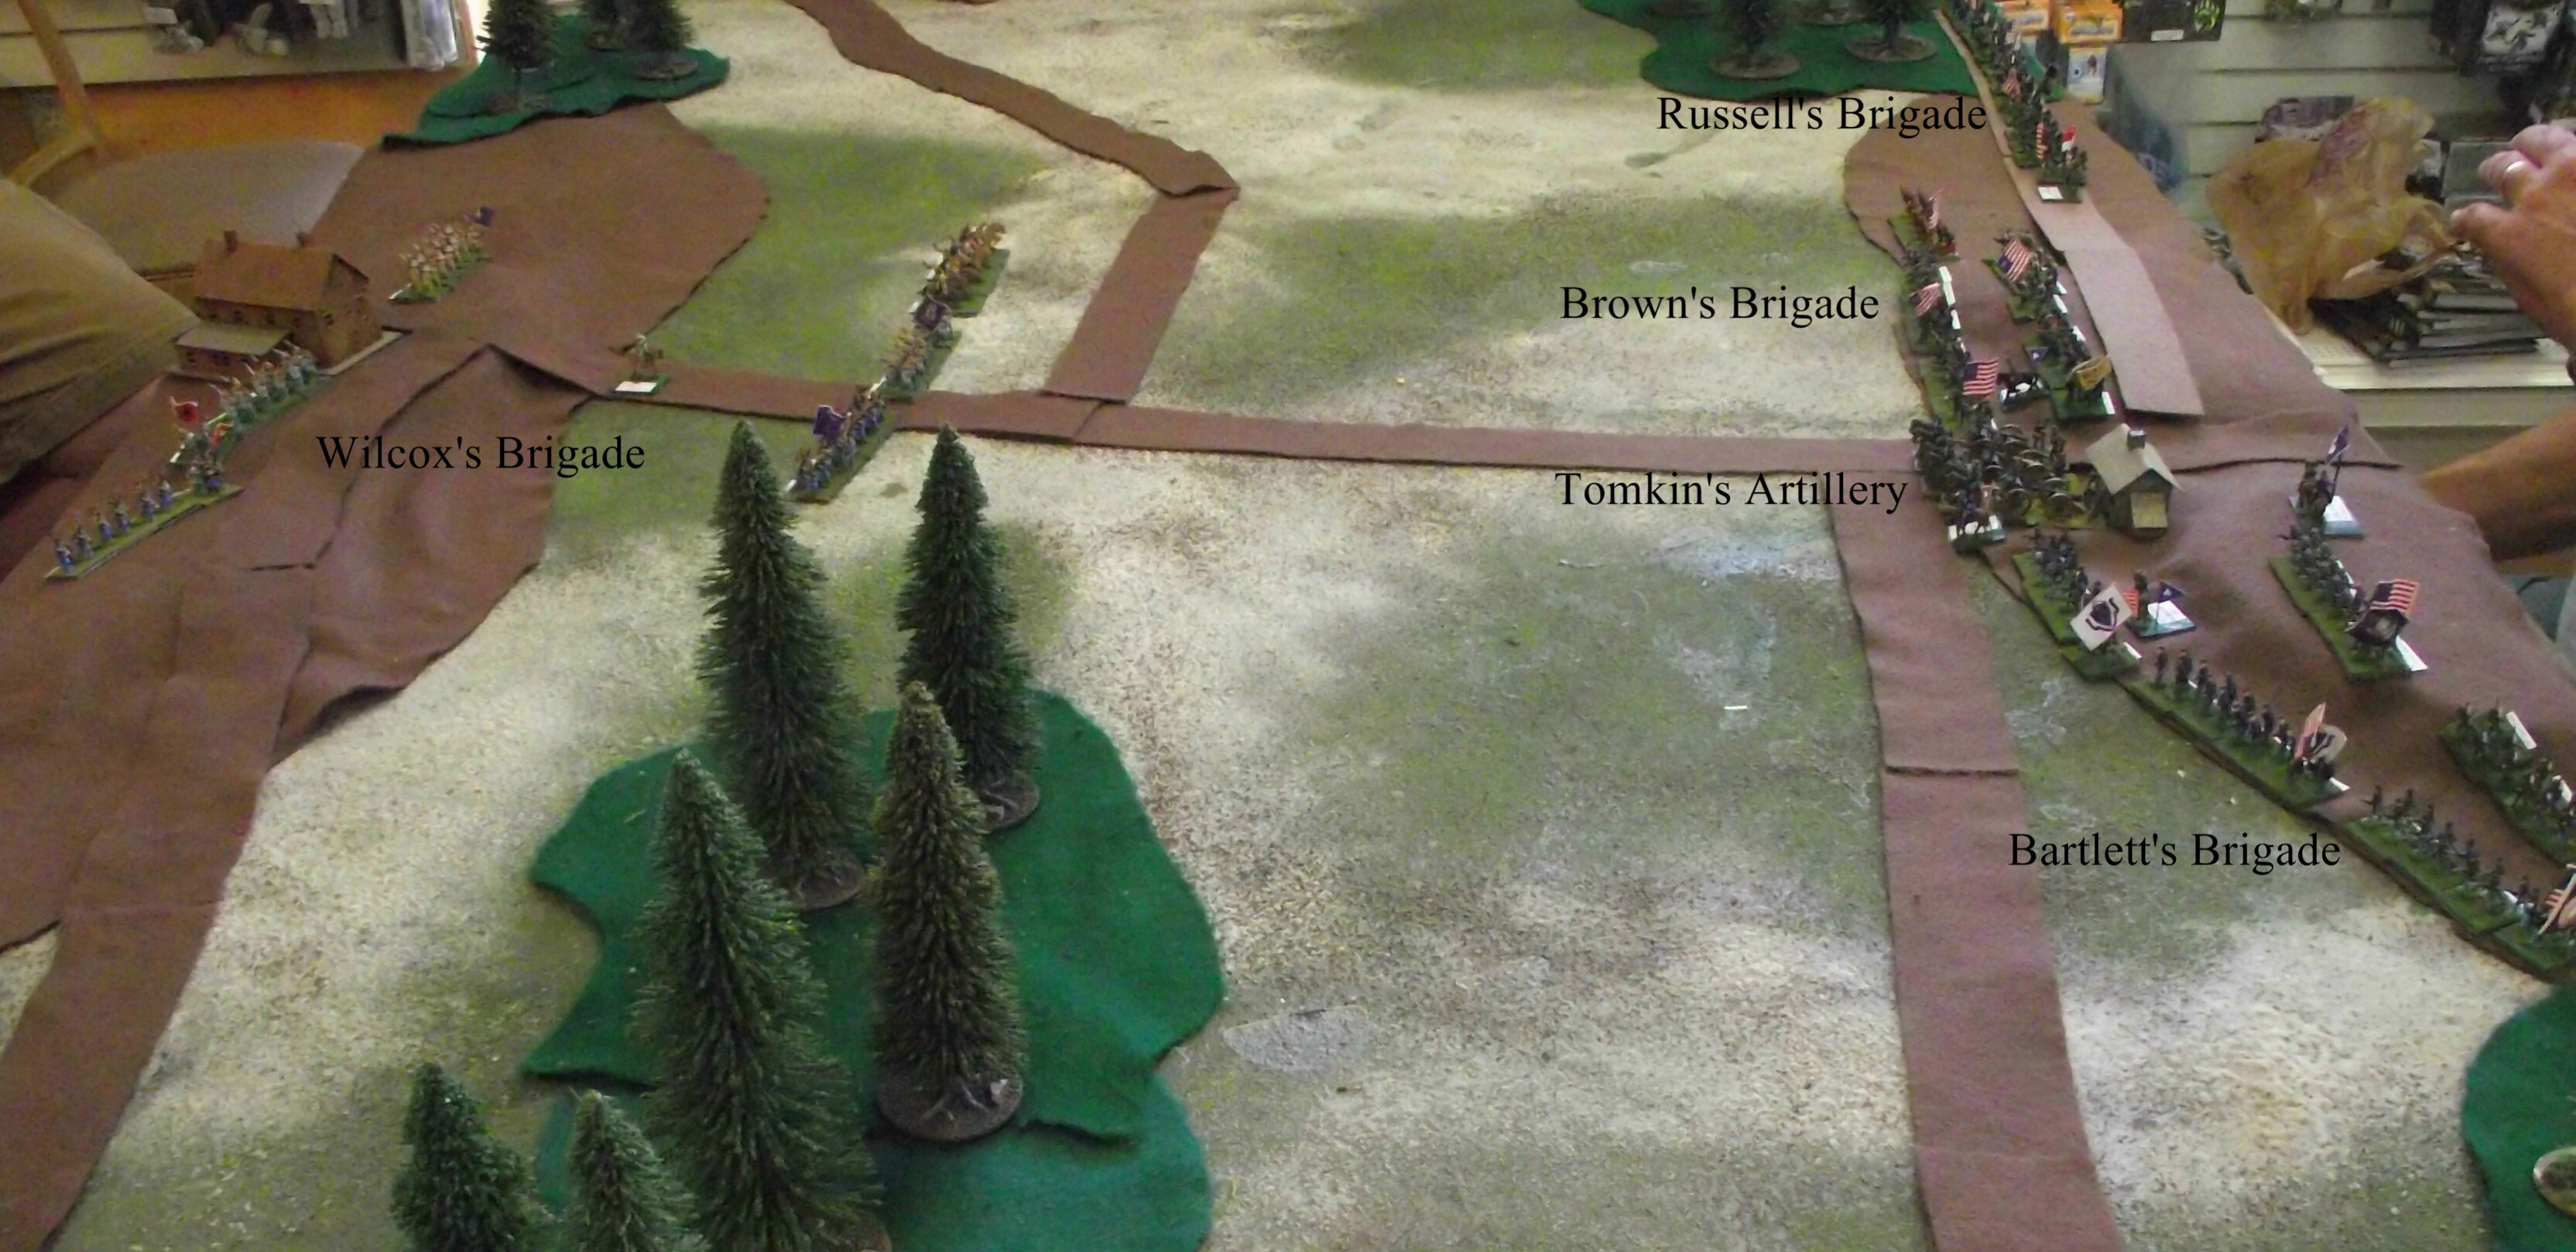
Initial positions with the Union on the right on Toll House ridge and Confederates on the left split between the Salem Church ridge and the valley below. The entire valley floor is scrub providing light cover.
Union troops around the Toll House.
Brown’s Brigade has advanced rapidly to the Confederate skirmish lines, forcing them back. Bartlett’s Brigade moves slower on the Union left. Artillery advances down the turnpike. Confederate reinforcements (Semmes’ Brigade, to be followed by Mahoone’s) are slowed by the congestion on the turnpike.
Confederate fire from Wilcox and Semmes, and a flank threat by skirmishing dismounted cavalry have halted Brown’s Brigade, but Bartlett continues to sweep forward through the woods on the Union left.
After several turns of sitting idle on Toll House ridge, Russell’s Brigade rushes across the valley to extend the Union right. This ends the threat to Brown by Semmes’ Brigade and forces the enfilading Confederate battery to retreat. Bartlett has reached Salem Church ridge on the Union left. Mahone’s Brigade has arrived and is deploying on the Confederate left.
Tactically, the action ends with a stalemate at nightfall like the historic action, but for the overall battle that is all the Confederates needed. The Union VI Corps will not be able to move on Chancellorsville.
In this Black Powder scenario the advance guard of the Allied army had just arrived at a village crossroads. While still in march column, the advance guard is surprised by the appearance of a French blocking force tasked with the delay of the Allies. The French objective is to take the crossroads and hold it as long as possible.
Black Powder game using TFP (Total Fighting Power) Games counters from ‘Clash of Empires’, Austro-Prussian War of 1866. The scenario was a cooperative game with each player leading a Prussian division of two infantry brigades and divisional cavalry, artillery and jager units. The Austrian forces were controlled by a combination of programmed responses, die rolls and free kriegspiel.


You must be logged in to post a comment.