This weekend the local HMGS-South group played a Northwest Frontier game at the Dogs of War shop using The Sword and the Flame colonial rules, Revision 1.
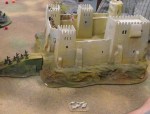
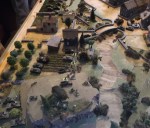
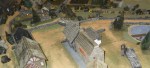
June 1882, near Black Mountain on the east side of the Indus valley. The pass below Black Mountain is blocked by a hostile tribe in a fort. The following British forces were ordered to take the fort. The fort was hand-made by Ian Weekley.
B Company, 2nd Gurkha Rifles
Detachment of the 19th Bengal Lancers Royal Artillery with Gatling gun Indian Artillery with mountain gun
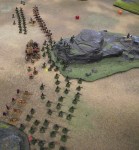
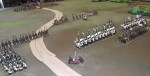
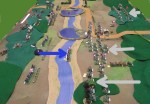
The British deploy. A Pathan unit appears outside the fort. The fort was built by Ian Weekley.
Gurkha deployed in open order
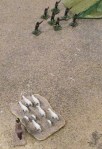
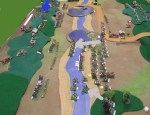
Russian ‘observers’ are sent out of the fort, but are quickly shot down by the Gurkhas.
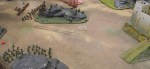
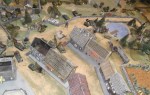
The rough ground is scouted. The Royal Artillery crew of the Gatling (on the elephants) is wiped out by the fort’s gun.
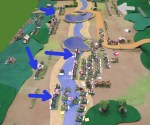
More Pathans appear to reinforce the fort.
In spite of heavy casualties, Gurkhas advance toward the gate.
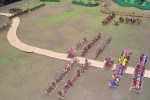
Gurkha firing lines trade shots and casualties with Pathans on the walls. The Bengal lancers, in near mutiny, refuse to advance.
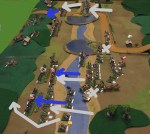
The gate is blown open. The defending Pathan units fail their tests when charged and the fort is taken.
The Pathan leader sneaks out and pretends to be a sheepherder.
This weekend (November 23, 2013) the local HMGS-South group played a 1879 Zulu War game at the Dogs of War shop using The Sword and the Flame colonial rules, Revision 1.
Date: June 1879, second invasion of Zululand
Location: Near Fort Newdigate, guarding the supply line of the main army advancing on Ulundi.
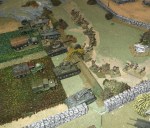
Situation: Supply columns had been attacked by Zulu raiding parties based in hilly terrain overlooking the track to Ulundi. A force was organized from the garrison of Fort Newdigate and ordered to clear the hills of Zulu. This force consisted of three platoons of infantry, one platoon of Naval Brigade rifles, a detachment of the 17th Lancers and one Gatling gun.
The Zulu force consisted of six units (mixed rifle and spear) hidden in rough terrain. Other Zulu units would arrive when firing could be heard from the battle.
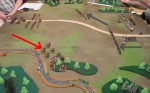
The British advance. Zulu hidden positions are in the distance.
A couple of Zulu units break cover and advance.
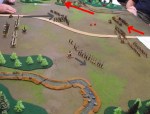
The British form firing lines while the remaining Zulu leave their hidden positions in the hills and advance.
The right end of the British line is charged from all sides.
The right end of the British line is overwhelmed.
Zulu reinforcements. Most would not be needed.
The British fall back to face threats from several directions as Zulu arrive on the field behind them.
Significant casualties on both sides in the final clashes. An odd blue box appears to mark a 50th anniversary.
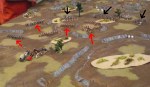
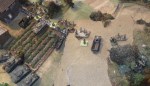
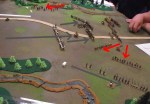
Elements of the 14th Armored Division, 242nd Infantry Regiment and 315th Infantry Regiment attempt to secure the villages of Hatten and Rittershoffen but are counterattacked by units of 21st the Panzer, 25th Panzer Grenadier and 47th Volksgrenadierdivisions.
The northern 88, to be knocked out early in the battle.
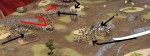
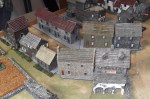
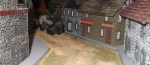
The seemingly empty town actually crawling with German infantry.
Seems peaceful.
The southern 88 survived but didn’t hit much.
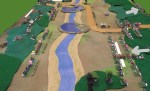
The Americans advance on a broad front and rush across the only bridge.
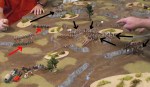
What little is left of the first infantry unit across the bridge is pinned down.
Infantry use the dry river bed for cover.
The lead tanks are severely handled.
Many vehicles bog down crossing the dry river bed.
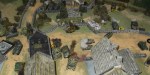
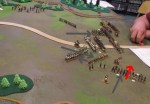
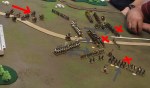
The counter attack of the 21st Panzer catches the Americans by surprise.
Carnage on both sides as the tanks engage at point blank range.
Saturday the local HMGS-South group played a game of Hail Caesar at the Dogs of War shop.
The fictitious Battle of Schwetz, June 1309, takes place in what is now northern Poland and is between the Teutonic Order and the forces of the Polish King Władysław I. Following the ‘takeover’ of Danzig, the Teutonic Order is on the march to take the nearby city of Schwetz. The Teutonic Order is intercepted by Polish forces outside the city.
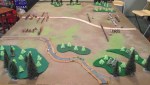
The Order is on the right, the Poles on the left.
The Order have one mounted division and two foot.
The Poles have two mounted divisions and one foot.
Polish light horse and Order light foot each move to their right.
View from the opposite side. Polish foot and the Order knights are reluctant to advance. Polish light horse blunders around in the woods.
Ignoring the threat to their left flank, the Order advances in the center.
Order charges push back several Polish units, but the Polish archers repel two charges by knights.
Three Polish foot units break in one turn, breaking their division. The mounted Poles wisely decide to call it a day.
Saturday the local HMGS-South group played a game of Black Powder at the Dogs of War shop.
This scenario is also known as The Battle of Beaver Dam Creek, 26 June, 1862. Three brigades of confederate infantry with two attached batteries and three off-table artillery batteries attack two Union infantry brigades and 5 artillery batteries in breastworks.
Confederate off-table artillery is behind the Confederate left.
The left and center Confederate brigades advance while a blunder send the right brigade to the rear.
A blunder sends a Union unit charging across the creek. Confederate infantry deploys into skirmish order.
Confederate skirmishers surround the Union unit but fail to destroy it. With no attack in sight, the Union left flank units move to support the center.
Union units move up to support the unintentional advance. The Confederate right starts to move.
Union artillery has been concentrating on the Confederate batteries. Both are routed. The Union right withdraws but is broken in the process. The Confederate right wing takes advantage of poor Union command rolls and pushes in the Union left.
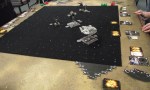
A well ordered Star Wars game on an adjacent table.


You must be logged in to post a comment.